7 Reasons Your Images Are Slowing Down Your Website in 2026

Your site might feel fast to you. Your browser has already cached everything. For a first-time visitor on a mobile connection, it’s a different story. Slow pages hurt your rankings, lose visitors, and cost you conversions. Images are almost always the biggest factor. Most sites simply never compress images consistently across the board.

Here are the seven most common reasons images slow websites down, and what you can do about each one.

01. You don’t compress images before uploading

A 4 MB product photo might look sharp, but it’s quietly hurting your page speed. Without proper image compression, large files increase Largest Contentful Paint (LCP), one of Google’s Core Web Vitals, and worsen mobile performance.

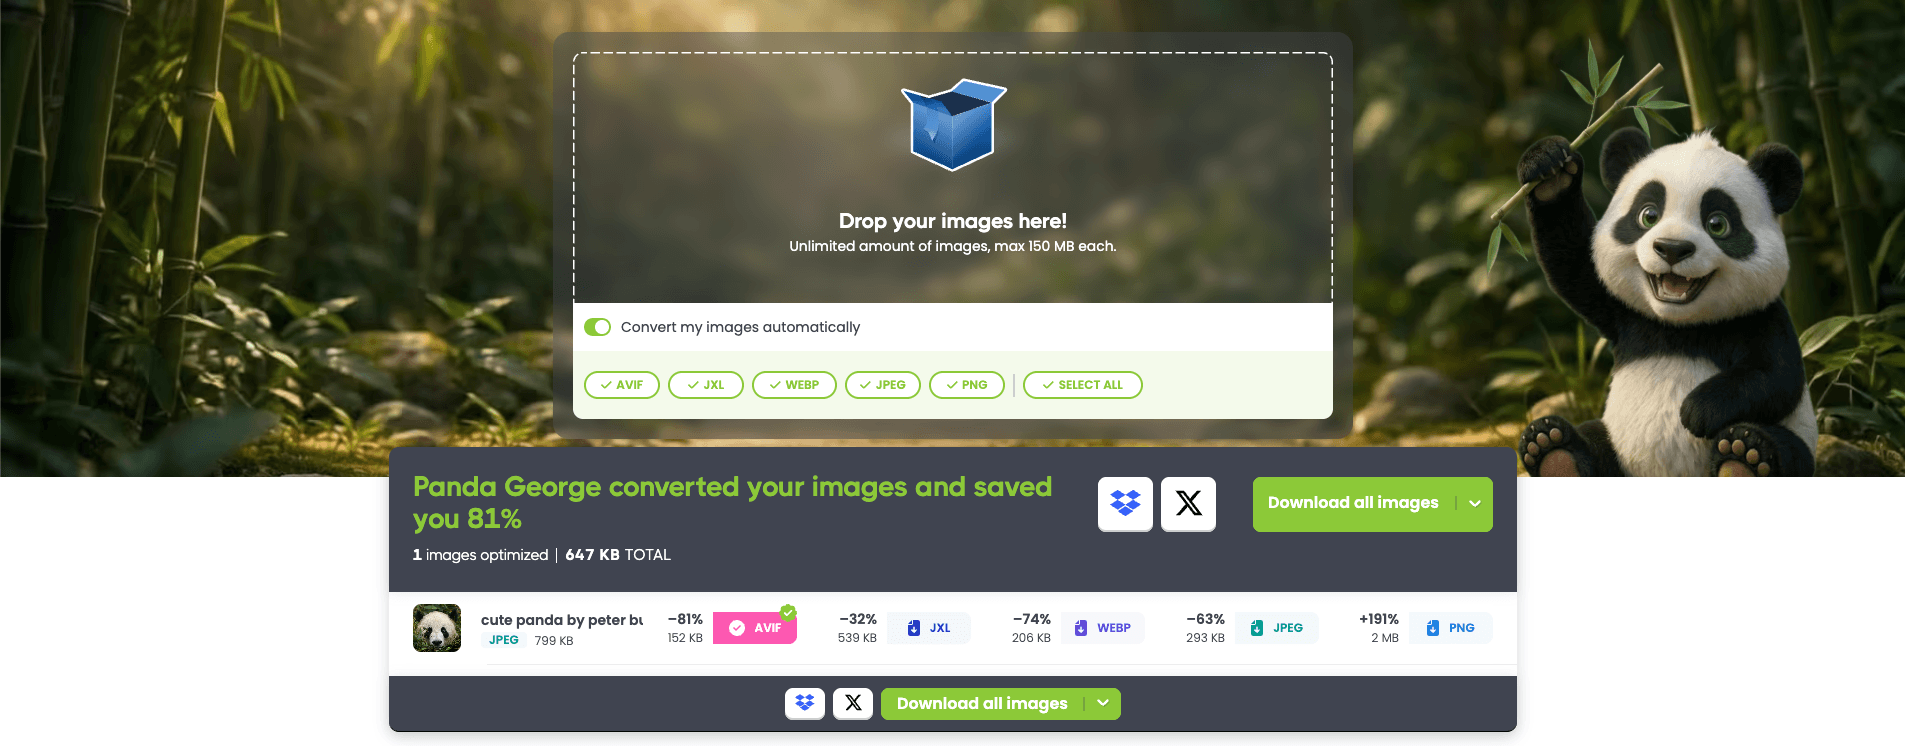
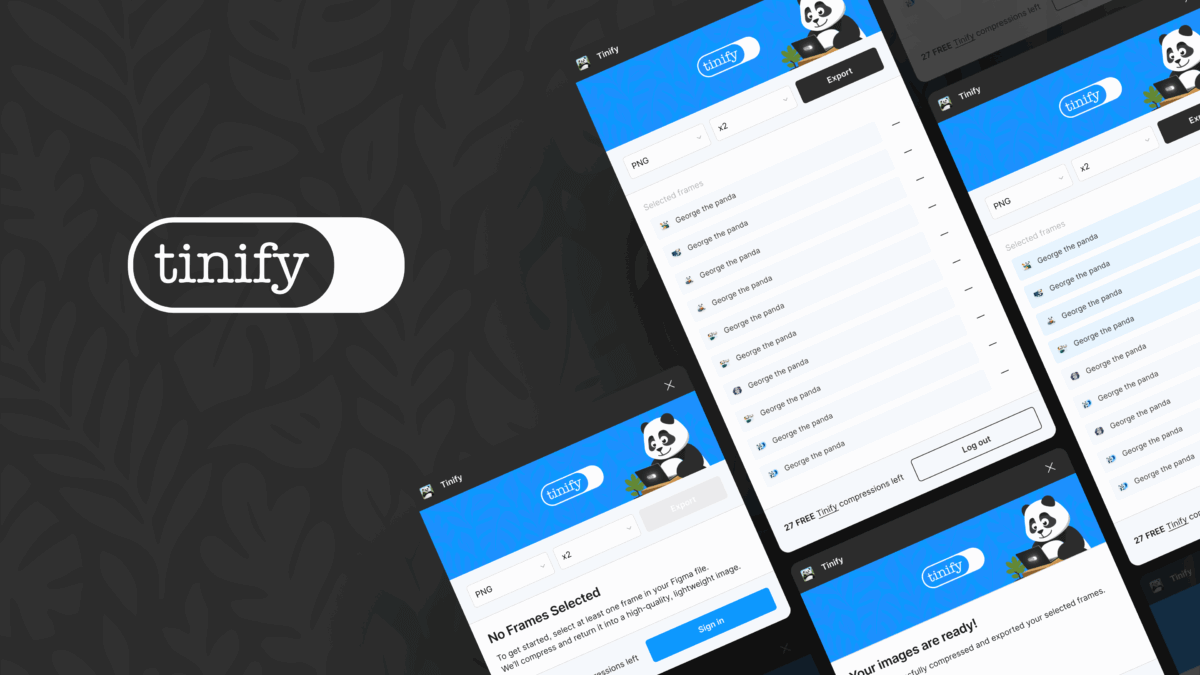
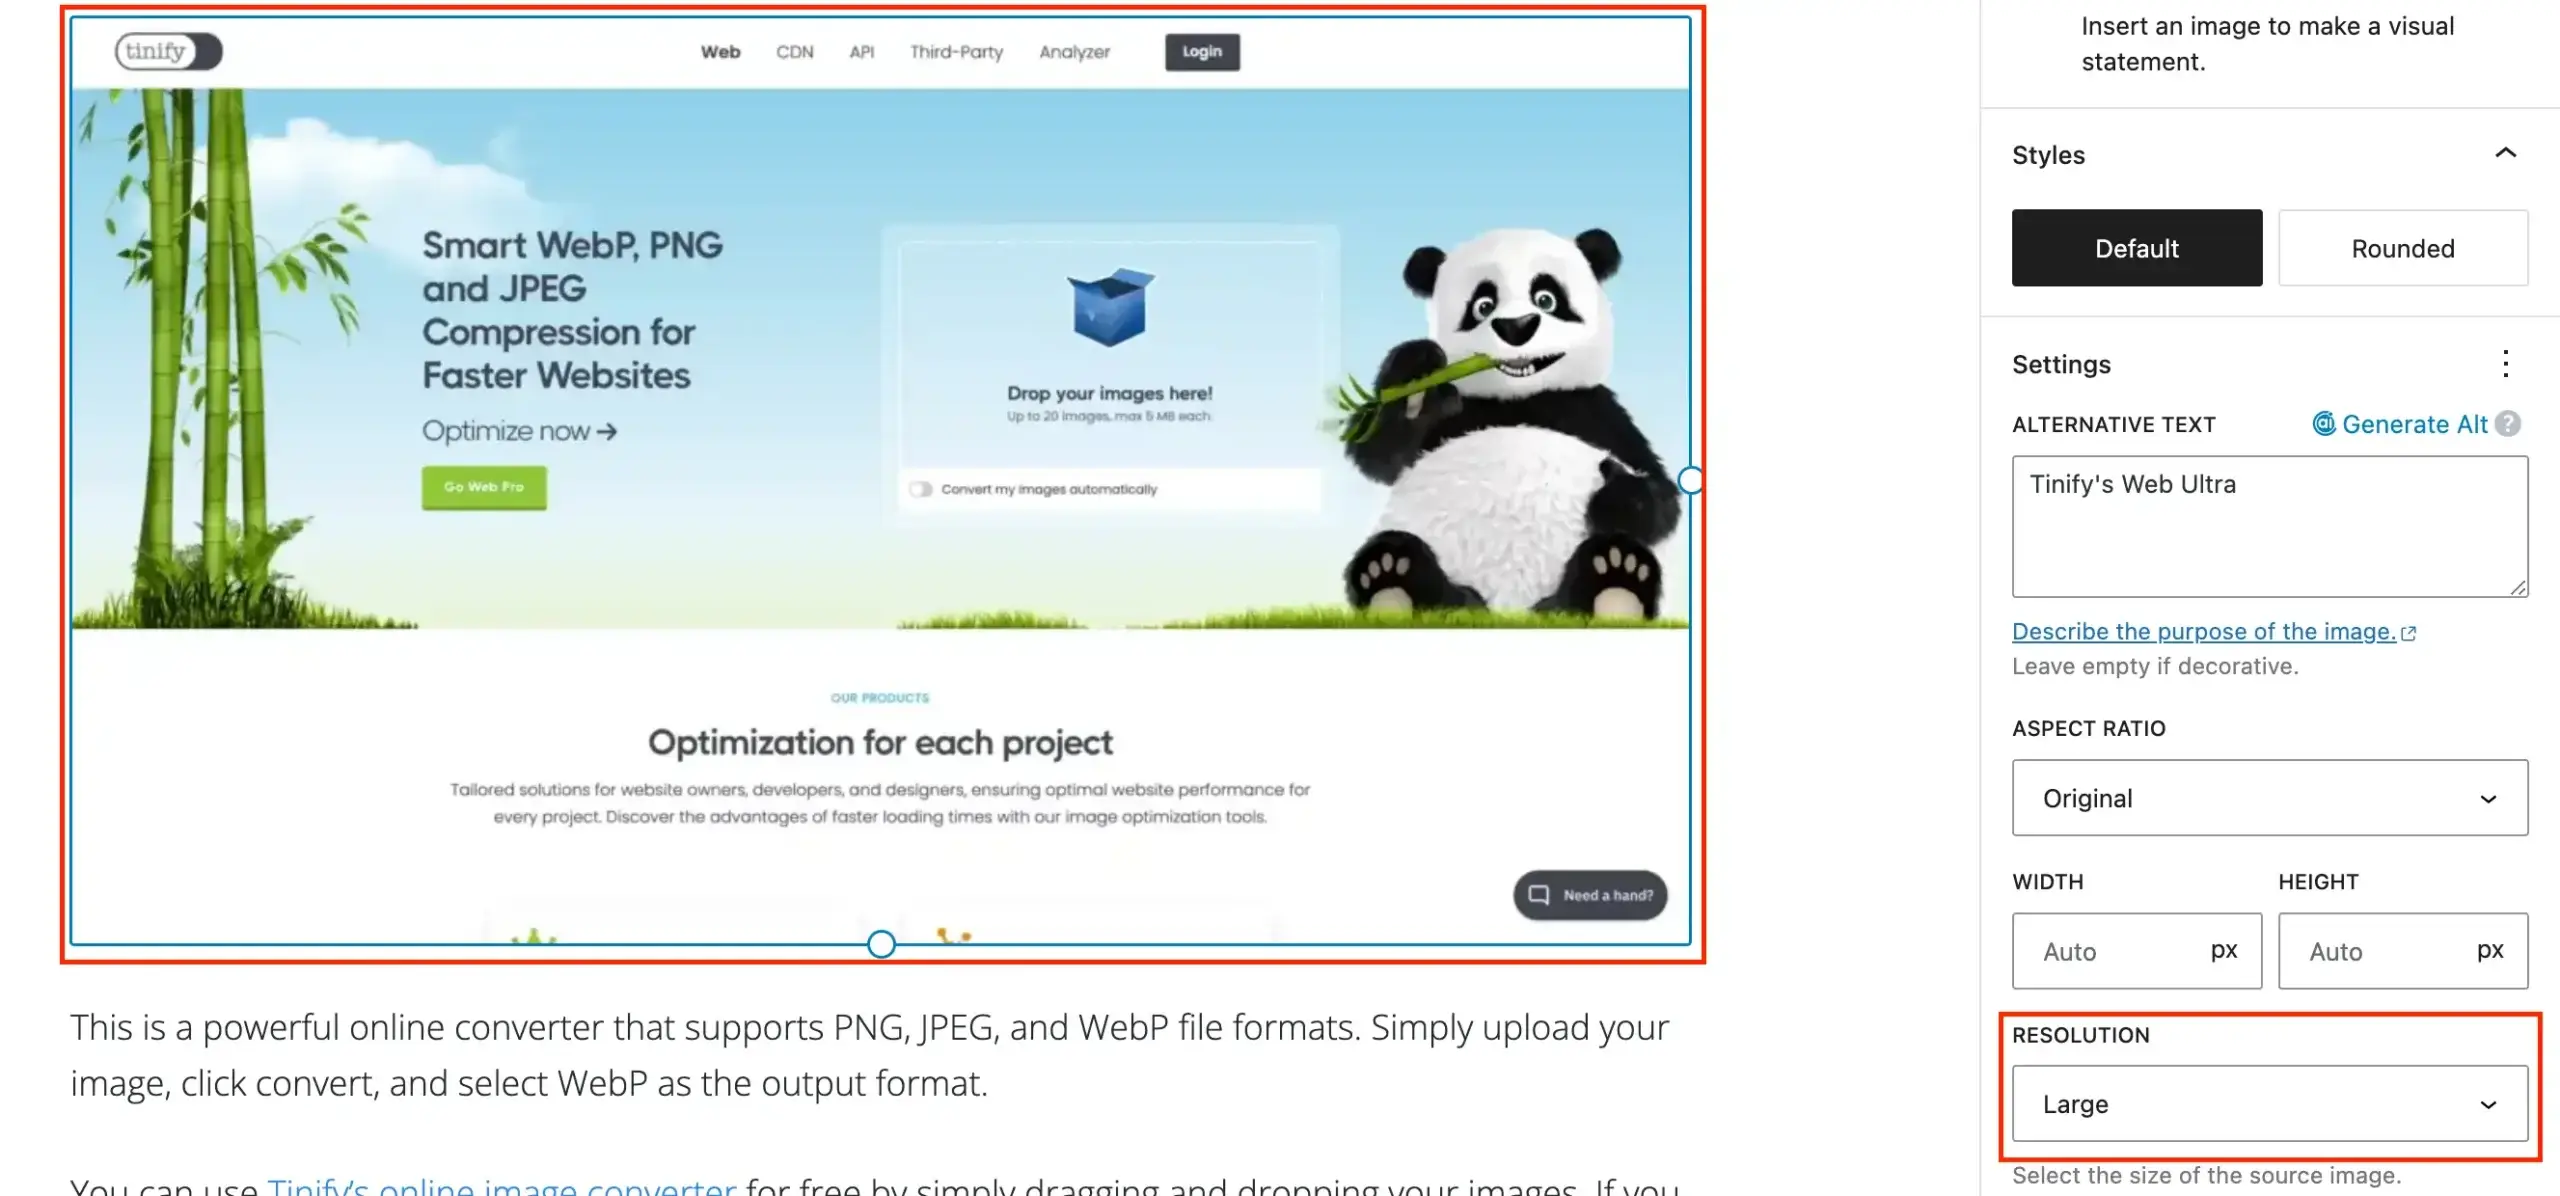
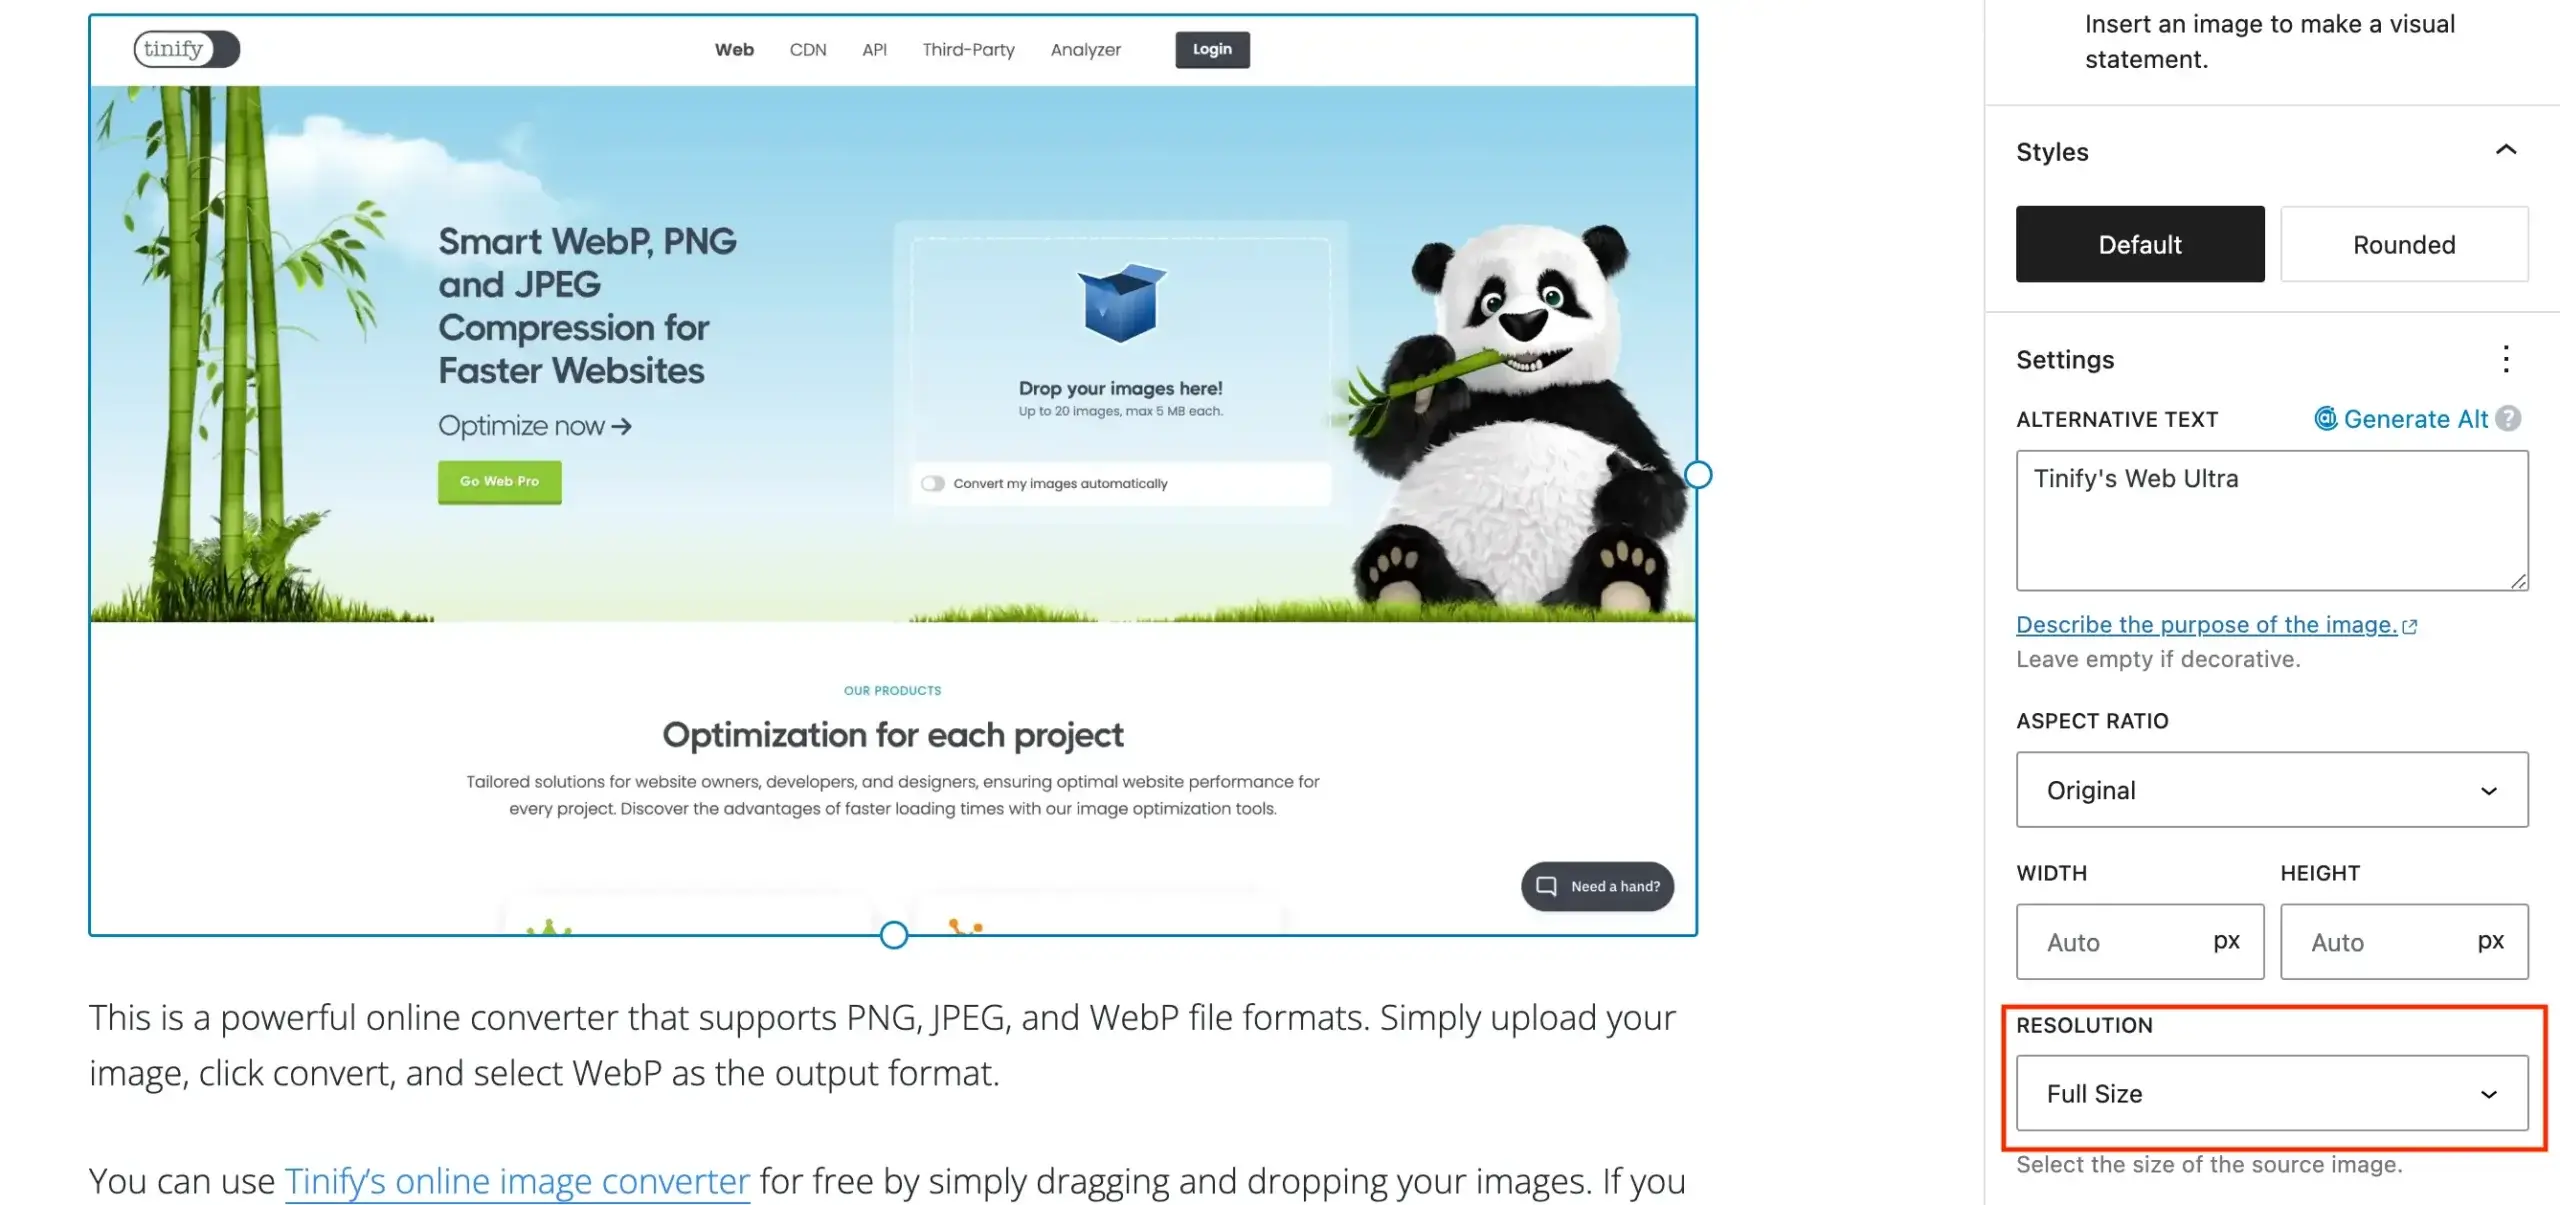
Tinify’s image compressor is a powerful image compression tool that lets you reduce image file size by up to 80% without visible quality loss. It supports PNG, JPEG, WebP, AVIF, and JPEG XL (JXL), making it easy to shrink image size without sacrificing quality. Smaller files load faster, which helps your SEO and keeps visitors from bouncing.

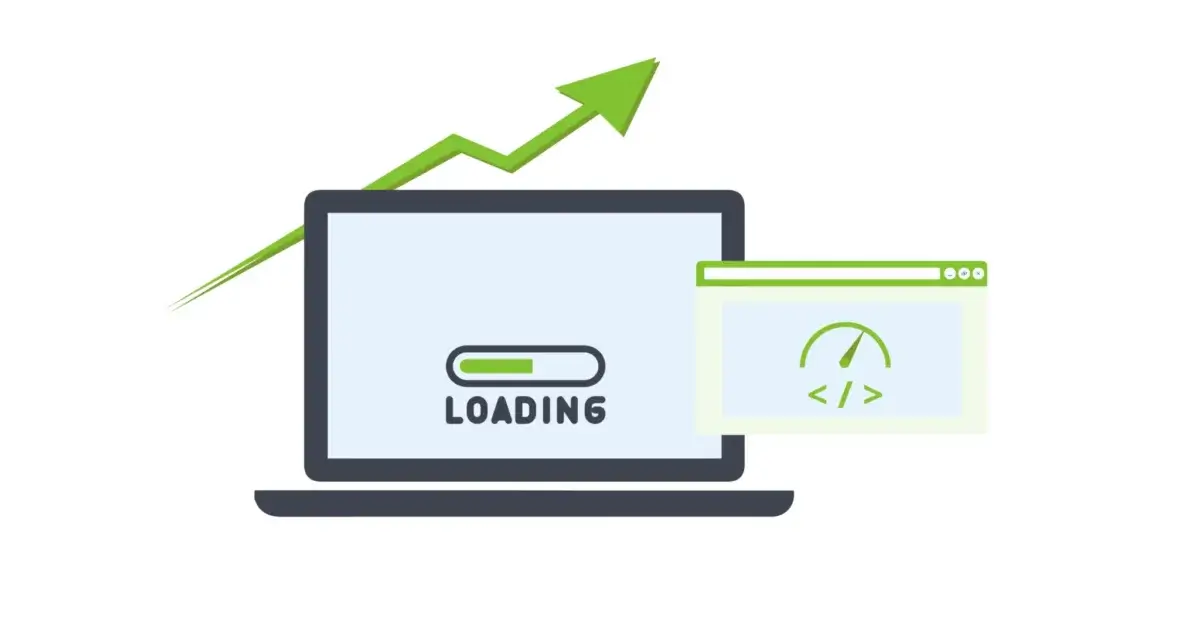
Curious how your site actually performs? Tinify’s page analyzer shows you exactly how much load time you could save by optimizing your images.

02. You’re still using JPEG and PNG for everything

JPEG and PNG are fine, but they’re no longer the most efficient options. Modern formats compress better at the same visual quality:

  • WebP reduces file sizes by around 30% more than JPEG or PNG
  • AVIF compresses even further, with slightly lower browser support
  • JPEG XL (JXL) is worth watching as browser support grows

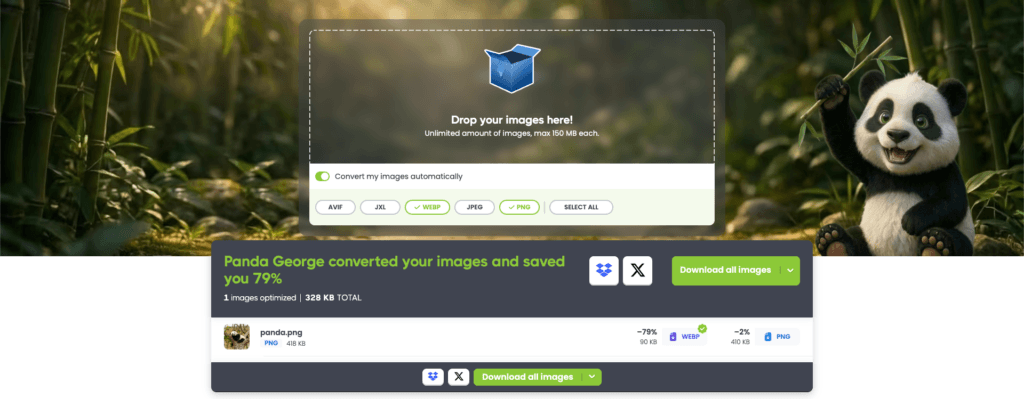
Using an image format converter to convert PNG to WebP or convert JPEG to WebP is often one of the easiest wins available. 

Tinify’s free online image converter supports AVIF, WebP, JPEG XL, JPEG, and PNG, making it straightforward to convert and compress images in one go.

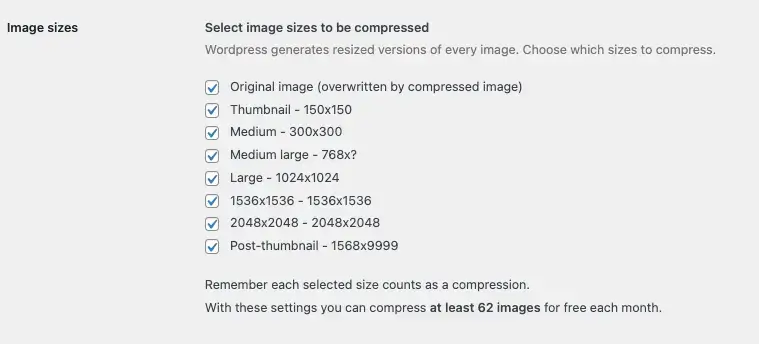
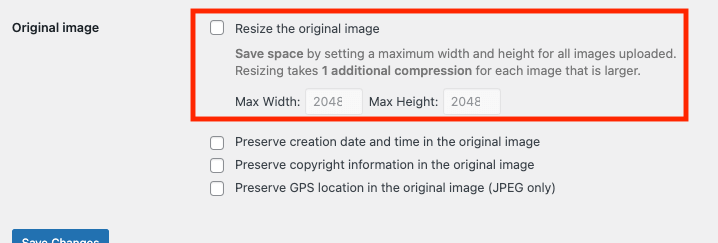
03. Your images are larger than they need to be

Uploading a 4000px-wide image and displaying it at 800px forces every visitor’s browser to download three times more data than necessary. That’s wasted bandwidth and slower load times for no visual benefit.

Resize images to match their display dimensions before you compress them. Using an image size reducer alongside correct dimensions gives you the biggest performance improvement. The goal is to compress image to decrease image size at every step, not just at upload.

See the difference yourself

Drop in an image and watch the file size shrink.

Compress images

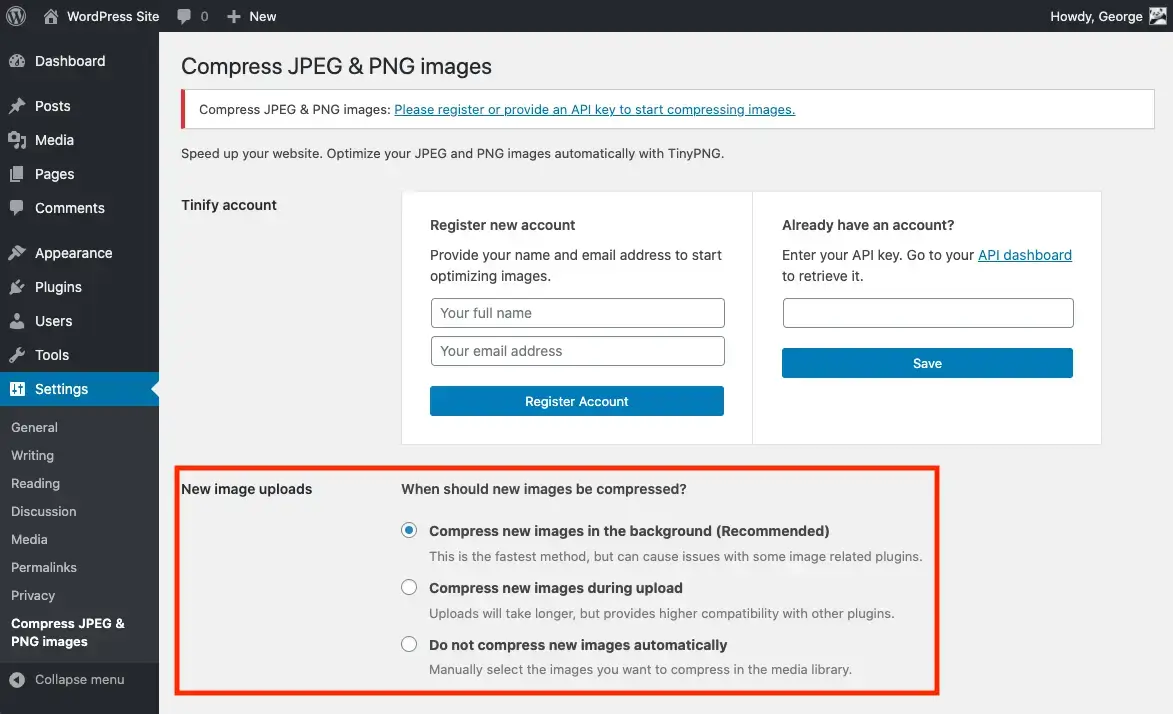
04. You’re compressing images manually

Manual compression works until it doesn’t. Here’s what typically happens:

  • Team members upload images without compressing them
  • Deadlines get tight and optimization gets skipped
  • New pages go live heavily, and nobody notices until it’s a problem

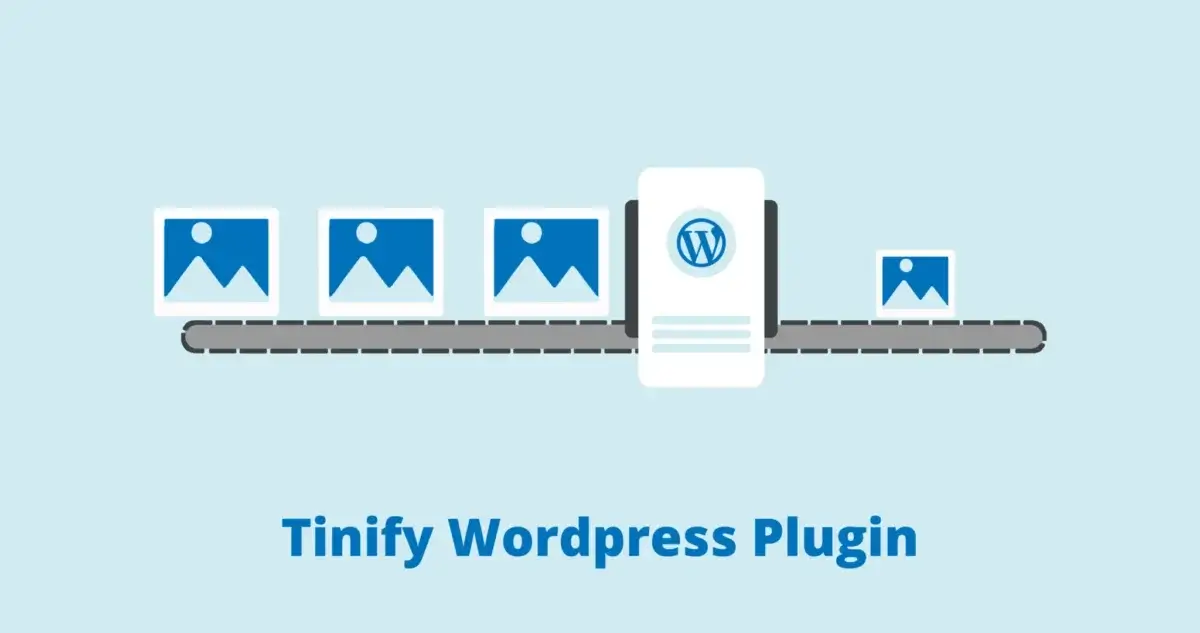
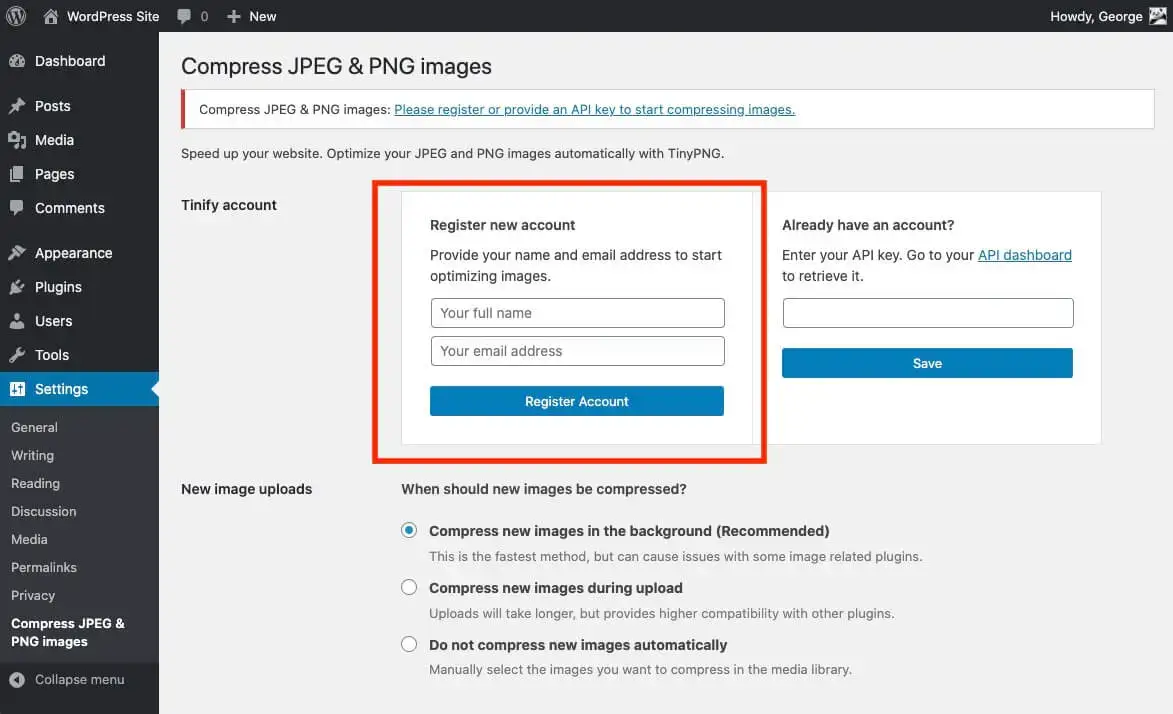
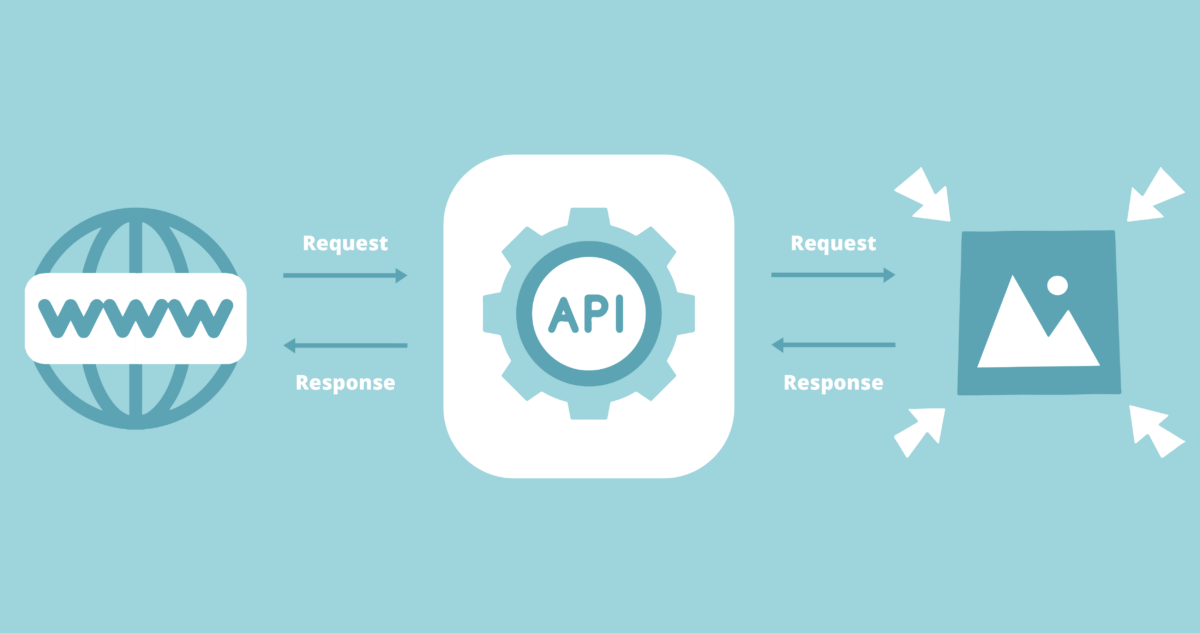
Tinify’s image compression API acts as a dedicated image file compressor that plugs directly into your upload workflow or CMS. Every image automatically compresses, with no need to open a separate online image compressor, with no manual steps, no separate tool to open, and consistent results every time.

For developers building image pipelines or SaaS platforms handling user uploads, it’s the difference between a process that scales and one that doesn’t. It also works as a bulk image compressor, so whether you’re processing a handful of photos or thousands, you don’t need a separate batch image compressor tool.

05. Your images are being served from a single origin server

When your images live on a single server, visitors who are geographically far away wait longer for them to load. That affects:

  • Load times for international visitors
  • Core Web Vitals scores that feed into your search rankings
  • User experience on pages with lots of images

Tinify’s CDN spans three independent networks and automatically serves AVIF and WebP where supported. Pairing compression with CDN delivery is one of the most effective ways to optimize images for web and improve your global performance.

06. All your images load at once

Even well-compressed images can slow a page if they all load at once. Common offenders include:

  • Long product pages with dozens of images
  • Image-heavy blog posts and editorial layouts
  • Portfolio galleries that load everything up front

Lazy loading ensures images only load when a visitor scrolls to them. Combined with Tinify’s compression and CDN delivery, this helps you optimize image loading, keep your initial page weight low, and your first paint times fast. Compress images once and let lazy loading handle the rest!

07. Mobile visitors are downloading desktop images

Mobile accounts for the majority of web traffic, yet many sites never compress images for mobile. A 2000px image looks fine on a desktop monitor. On a phone, it’s unnecessary data, which adds load time and drives visitors away.

Image quality matters here too. You don’t need to noticeably lower image quality; the goal is finding the threshold where visual fidelity and file size are both acceptable. Tinify’s file size reducer handles this across all supported formats. Pair that with responsive images using srcset in HTML and CDN delivery, and mobile load times improve considerably.

The pattern behind all seven problems

Most image performance problems share a common root cause: images are an afterthought. They get uploaded, displayed, and forgotten with no image compression or optimization until the site starts feeling slow.

The fix isn’t complicated, but it does need to be consistent:

  • Compress images before it goes live
  • Reduce file sizes at the point of upload
  • Switch to modern formats like WebP, AVIF, or JXL
  • Serve images through an image CDN
  • Automate what you can so it doesn’t depend on anyone remembering

If you want to see how much time you’re losing right now, Tinify’s Page Analyzer gives you a quick read on how much your current images are costing you.

Frequently asked questions (FAQs)

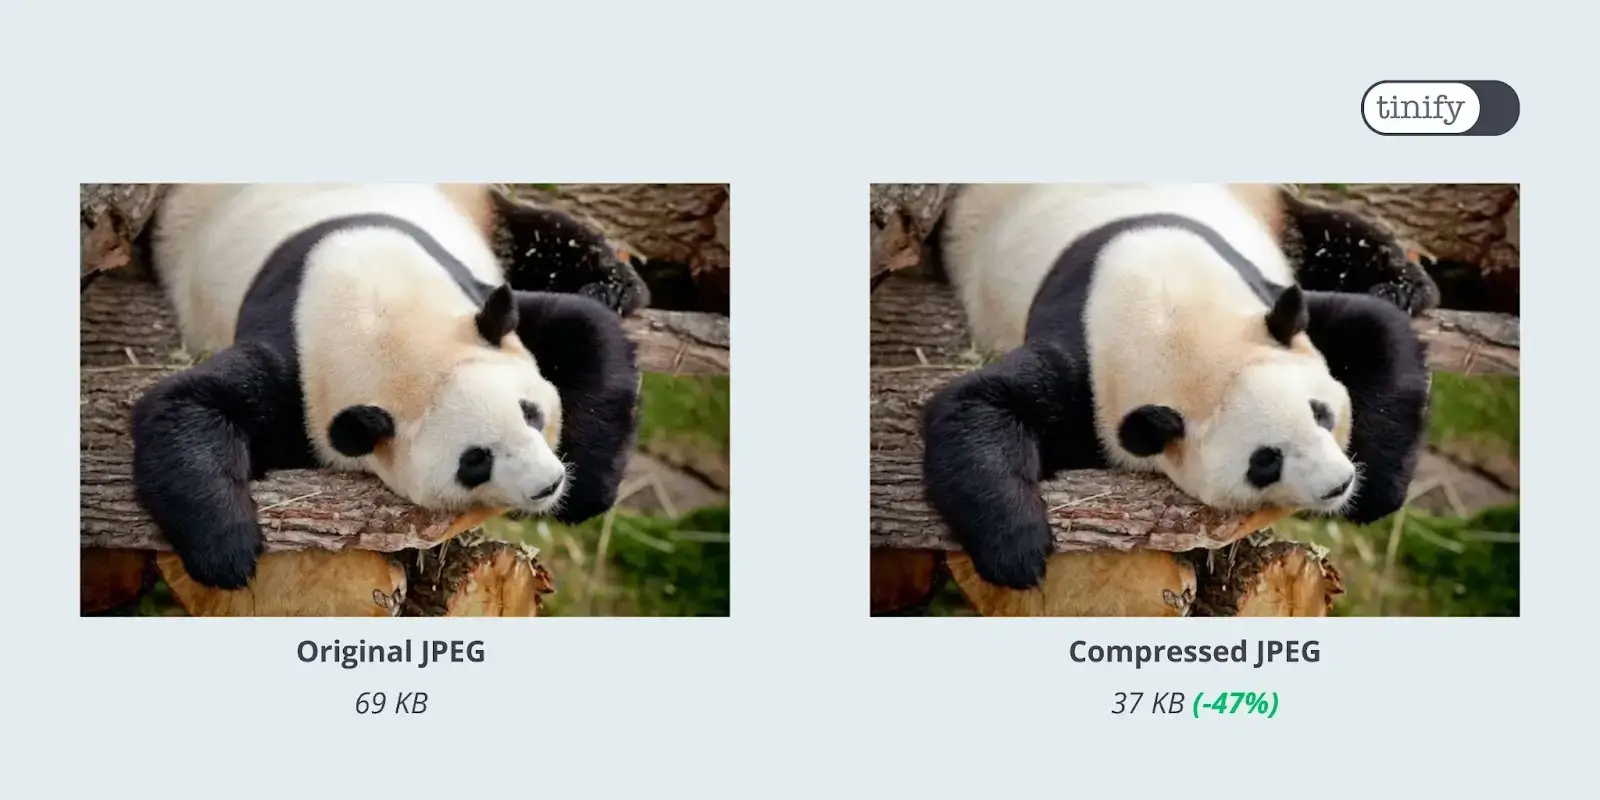
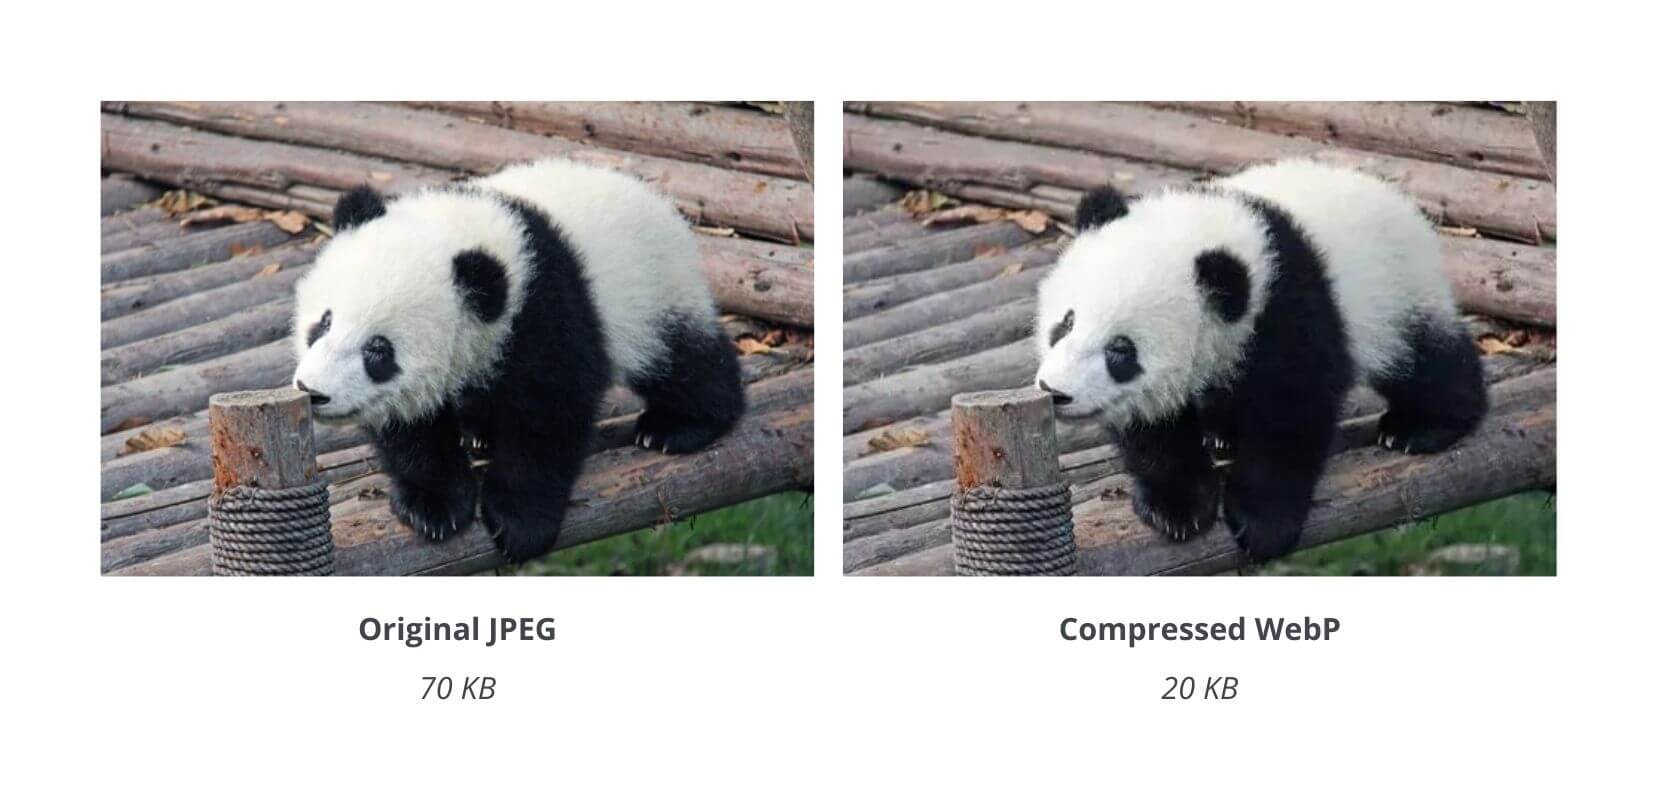
01. Does compressing images actually affect how they look? Tinify uses smart lossy compression to remove data your eye can’t detect. In most cases, the compressed image looks virtually identical to the original, while achieving much smaller file sizes.

Tinify’s image format converter can effectively compress JPEG and convert JPEG to WebP in just a few seconds. Can you spot the difference in quality between the two images?

02. What’s the difference between resizing and compressing? Resizing images changes the pixel dimensions. How you compress images, reducing the file size without changing dimensions, is a separate step. Both matter. An image that’s the right size but uncompressed is still heavier than it needs to be, and vice versa.

03. Do I need the API, or is the web tool enough? Depends on your usage. The Tinify free image size compressor handles up to 20 images at a time and works well for occasional use. If you’re uploading images more regularly, or running a CMS where multiple people add content, the developer API automates the process and removes the risk of images slipping through unoptimized.

04. How much does a CDN actually help? It depends on where your visitors are. If your audience is global and your server is in one region, a CDN can meaningfully reduce load times. Tinify’s CDN also handles format negotiation automatically, serving AVIF or WebP to browsers that support them.

05. Which image format should I use when I compress images? WebP is broadly supported and compresses better than JPEG or PNG at the same quality. AVIF compresses even further but has slightly lower browser support. Tinify supports both, along with JPEG XL (JXL), JPEG, and PNG, so you can use whichever format fits your workflow, or let the CDN handle format selection automatically.

Pros and Cons of WebP Images: 2026 Update

WebP is an image format created by Google, built on the VP8 video codec and designed for the web to replace JPEG and PNG with better compression. In 2026, it’s no longer the new kid on the block. Browser support is effectively universal. Two newer formats have emerged as competitors: AVIF, now widely supported, and JPEG XL, still finding its footing. And Google keeps nudging site owners toward next-gen formats through PageSpeed Insights. So, where does WebP actually stand? Here’s a clear-eyed look.

TL;DR

  • AVIF is now a serious alternative to WebP. It compresses better, retains more visual fidelity, and has broad browser support across Chrome, Firefox, Safari, and Edge. For image-heavy sites, it’s worth considering alongside WebP.
  • WebP browser support is effectively universal. Every major browser supports it. The <picture> fallback is now optional rather than something you need to plan around.
  • The format decision is more nuanced than it used to be. WebP is still the right default for most sites. But for high-performance use cases, the emergence of AVIF and JXL means the optimal choice now requires a more nuanced, case-by-case evaluation.
  • Tooling has caught up. WordPress, Shopify, and most CDNs now automatically handle WebP. For many sites, switching is less a technical challenge and more a case of turning the right setting on.

What is WebP?

WebP is an image format created by Google in 2010, designed specifically for web use. It supports both lossy and lossless compression, transparency (via an 8-bit alpha channel), and animation. Think of it as one format doing the job of JPEG, PNG, and GIF combined, usually at a smaller file size. For anyone figuring out how to optimize images for web, it’s the most practical starting point.

The pros of WebP

Smaller file sizes

This is WebP’s main selling point, and it holds up. According to Google’s WebP compression study, WebP lossy images are 25–34% smaller than equivalent JPEGs, and WebP lossless images are around 26% smaller than PNGs at comparable quality. For a content-heavy website, that adds up quickly across a full image library.

Tinify compresses WebP files using the same smart lossy compression it applies to all major formats. This process can shrink WebP file sizes by up to 80% while preserving the original visual quality. As an image compressor, Tinify supports JPEG, PNG, animated PNG (APNG), WebP, AVIF, and JPEG XL (JXL): you can convert JPEG to WebP, convert PNG to WebP, or simply compress WebP images, all in the browser.

Universal browser support

The compatibility concerns that plagued early WebP adoption are effectively gone. In 2026, every major browser supports WebP: Chrome, Firefox, Safari, Edge, and Opera. Internet Explorer is the sole holdout, and its global usage share is negligible. You no longer need a <picture> fallback just for WebP, though it’s still good practice if you want to be thorough.

One format for multiple use cases

WebP handles transparency like PNG and animation like GIF, which means you can standardize on a single format across most of your image library. Fewer format decisions, simpler workflows.

Both lossy and lossless compression in one format

Most formats are one or the other. JPEG is lossy only. PNG is lossless only. WebP supports both lossy and lossless compression in a single format, which means you can use it for photographs (where some quality loss is acceptable) and for graphics, logos, or images with text (where preserving every pixel matters). You don’t have to switch formats based on image type, because WebP handles both.

Better Core Web Vitals scores

Smaller images mean faster Largest Contentful Paint (LCP), one of Google’s key ranking signals. If you’re currently serving original camera JPEGs or unoptimized PNGs, switching to compressed WebP is one of the most direct ways to improve your PageSpeed score. Google’s PageSpeed Insights flags JPEG and PNG images as candidates for conversion to WebP or AVIF. If you’re wondering how to optimize photos for website performance, that’s the right place to start. For more on the relationship between image size and site speed, see our guide on how to resize images for a faster website.

Broad tooling support

WebP is supported by most image editing software, CMSs, e-commerce platforms, and CDNs. WordPress compresses and serves WebP natively. Shopify serves WebP automatically to supported browsers. Squarespace converts all uploaded images to WebP by default. The TinyPNG WordPress plugin made by Tinify compresses WebP, AVIF, JPEG, and PNG images automatically on upload.

The cons of WebP

AVIF and JPEG XL compress better

WebP’s biggest limitation in 2026 is that newer formats do the same job more efficiently. AVIF (the AV1 Image File Format, released in 2019) consistently produces smaller files than WebP at the same visual quality, with the advantage most noticeable on photographs and high-resolution images. Browser coverage is now broad enough that serving AVIF with a WebP fallback is increasingly practical for performance-critical sites. JPEG XL is also worth watching: Chrome 145 restores native JXL support, and it offers compression competitive with AVIF alongside some useful features like lossless transcoding from existing JPEGs.

Compression artifacts and dimension constraints

Pushing WebP compression too hard can introduce visible artifacts, especially in images with fine textures or intricate details. Tinify’s image optimizer analyzes each image individually to find the right balance automatically, so you don’t have to tune compression settings manually.

WebP also has a hard dimension cap: images cannot exceed 16,383 pixels in either width or height. For most web use cases, this isn’t an issue, but it’s worth knowing if you work with very large source images.

Not ideal outside the web

WebP is built for web delivery. It’s less suited for print workflows, professional publishing, or offline applications. Most print-on-demand platforms don’t accept WebP natively, and color accuracy can be an issue in print contexts. For those workflows, JPEG or PNG remains the standard.

Email clients don’t reliably support WebP

Web browsers have WebP covered, but email is a different story. Gmail only partially supports WebP, converting images to JPEG before delivery, which means transparent backgrounds break. Outlook on Windows doesn’t support WebP at all, showing a broken image instead. If your site sends transactional emails or newsletters that pull images from your media library, serving only WebP images can cause problems. The safest approach is to keep JPEG or PNG originals available as fallbacks for email contexts.

Figma doesn’t export WebP natively

Figma still doesn’t support WebP as a native export format. Designers working on web projects have to export as PNG or JPEG first and then convert separately, which adds friction to the workflow. 

Tip: The Tinify Figma plugin solves this directly. It exports and compresses to WebP (and AVIF) in one step, without leaving Figma.

Export Figma designs in WebP format using the Tinify Figma plugin.

Conversion at scale takes planning

For sites with large existing image libraries, converting everything to WebP takes time and the right tooling. Not all converters handle compression well, and some can produce WebP files that are larger than the original if settings aren’t dialed in. Using a purpose-built tool like Tinify’s image converter avoids this: it compresses and converts in one step, and its algorithm picks the right settings for each image.

Should you use WebP in 2026?

Yes, with one nuance.

WebP remains a solid, reliable choice for most websites. The file size savings over JPEG and PNG are real, browser support is effectively universal, and tooling is mature. If you haven’t made the switch yet, there’s no good reason to wait.

The nuance is that AVIF now competes seriously for the same role. The practical recommendation for 2026 looks like this:

  • For most sites (blogs, marketing pages, portfolios): Use WebP. It’s simple, well-supported, and a clear improvement over JPEG and PNG.
  • For image-heavy or performance-critical sites: Consider serving AVIF to modern browsers with WebP as a fallback, using the <picture> tag or a CDN that handles format negotiation automatically.
  • For animated images: WebP is still the safest choice. AVIF animation support varies across implementations, and JXL animation support is even more limited.
  • Keep an eye on JPEG XL: If Chrome enables JXL by default in a future release, adoption could accelerate quickly. It’s not a format to serve today, but worth factoring into longer-term planning.

How to convert your images to WebP

You can convert JPEG, PNG, AVIF, and JXL images to WebP directly on Tinify’s WebP converter. Upload your images, select WebP as the output format, and Tinify will convert and compress them in one go. It also works the other way: if you need to convert WebP to PNG or another format, the same tool handles that too. The free tool allows up to 3 conversions per session; the Web Ultra subscription gives you unlimited conversions. New to image compression? Our image conversion for beginners guide walks you through the basics.

For teams with larger workflows, Tinify has tools for every setup:

  • Tinify API: Handles compression and conversion in a single step, with direct export to Amazon S3 or Google Cloud Storage. Includes 250 free conversions per month.
  • Tinify WordPress plugin: Compresses and converts images automatically on upload, powered by the Tinify API. Includes 500 free compressions per month.
  • Tinify Figma plugin: Optimizes images directly from your design exports, no extra steps needed.
  • Tinify CDN: Automatically serves WebP images (and other supported formats) to browsers that support them, with no code changes required on your end.

Try it yourself

Convert images to WebP and see the file size difference.

Convert your images

WebP isn’t the newest format anymore, but it’s still one of the most practical ones. Converting your existing JPEG and PNG images to WebP will improve page speed and reduce bandwidth. If you want to go further, pairing it with AVIF gives you the best of both worlds. And if Chrome ships JPEG XL support by default, it may become the next format worth switching to.

Frequently asked questions (FAQs)

01. Is WebP better than JPEG and PNG? For web use, yes. WebP lossy files are 25–34% smaller than equivalent JPEGs, and WebP lossless files are around 26% smaller than PNGs, at the same visual quality. Note: Platform support has improved significantly, but it’s still worth checking your CMS and third-party tools before switching your whole library over.

02. Does WebP work in all browsers? Yes, in every browser that matters: Chrome, Firefox, Safari, Edge, and Opera. Internet Explorer doesn’t support it, but IE’s global usage share is negligible. 

03. Is WebP or AVIF better in 2026? That depends on your priorities. AVIF compresses better and browser support has caught up, but WebP is simpler to work with and supported across more tools and platforms. For most sites, WebP is still the right default. For image-heavy or performance-critical sites, serving AVIF with a WebP fallback via the <picture> tag gives you the best of both.

04. Does converting to WebP reduce image quality? Tinify’s smart lossy compression automatically finds the right balance, reducing file sizes by up to 80% with no noticeable quality loss. Lossy compression does remove some image data, but the difference isn’t visible to the human eye.

05. Can I convert PNG or JPEG to WebP for free? Yes. Tinify’s free online image converter lets you convert up to 3 images per session. Compression happens alongside conversion, so you get the smallest possible file in one step. Web Ultra removes that limit for unlimited conversions.

06. What is JPEG XL and should I use it? JPEG XL (JXL) is a new image format that offers compression comparable to AVIF. A significant advantage is its ability to losslessly transcode existing JPEGs, allowing the original file to recover later. Chrome 145 restores native JXL support, with partial support in Firefox and Safari too. Browser coverage is still in the early stages, so WebP and AVIF are the practical choices for now, but JXL is worth keeping on your radar.

07. How do I serve WebP on WordPress? Install the TinyPNG WordPress plugin (by Tinify). It compresses WebP, AVIF, JPEG, and PNG images automatically on upload, with 500 free compressions per month. WordPress has supported WebP natively since version 5.8.

Lossy vs Lossless Compression Explained for Image Optimization

Images are essential for engaging websites, but large file sizes can significantly slow down performance. If you’re wondering how to reduce image file size without noticeable quality loss, understanding image compression is the key.

In this guide, we’ll break down lossy vs lossless compression and show you how to optimize images effectively.

What is image compression?

Image compression is the process of reducing file size while preserving as much visual quality as possible.

There are two main approaches:

  • Lossy compression: reduces file size by permanently removing some image data
  • Lossless compression: reduces file size by removing unnecessary metadata

Both methods are widely used in modern image optimization, depending on the use case.

Lossy vs lossless compression: What’s the difference?

Understanding lossless and lossy compression is key to choosing the right approach.

Lossy vs lossless compression: Quick comparison

Lossless Compression Lossy Compression
Summary

Image Quality

File size

Image Quality

File size

Definition No data is removed Some metadata is permanently removed
Best Use Cases Logos, icons, UI elements Photos, backgrounds, large visuals
Compression Method Data deduplication, encoding optimization Data removal + perceptual optimization
Performance Impact Improves speed slightly Significantly improves page speed
Editability Fully reversible Not reversible
Typical Use on Websites Graphics requiring precision Most images for performance optimization

Pros and cons of lossless and lossy compression

Lossless Compression Lossy Compression
Pros – No loss of image quality
– Fully reversible
– Much smaller file sizes
– Visually similar to original (at optimal levels)
Cons – Limited size reduction
– Larger files than lossy
– Not reversible
– Quality loss at higher compression

When should you use each?

Choosing between lossless compression of images and a lossy compression method depends on how important image quality is compared to file size.

  • Use lossless compression when quality must remain exact. Lossless compression ensures every pixel is preserved, making it ideal when precision matters.
  • Use lossy compression when reducing file size is more important than perfect fidelity. A well-optimized lossy-compressed image often appears identical to the original to the human eye, while significantly reducing file size and improving load times.

How to reduce image file size without noticeable quality loss

Here’s how to do it in practice:

01. Use a modern file compressor

A reliable image compressor quickly reduces image size while maintaining visual quality.

Modern tools use advanced lossy compression and optimizations to remove only data that isn’t noticeable to the human eye. Tools like Tinify automate this process efficiently.

Panda George saves 81% on your image with Tinify’s smart lossy compression technique.

02. Choose the right compression method

Not all images should be treated the same.

  • Use lossy compression for photographs and complex visuals
  • Use lossless compression techniques only when every pixel must remain unchanged (e.g., logos or UI elements)

In most web use cases, a well-optimized lossy compression image will look identical to the original while being significantly smaller.

03. Convert to modern formats

Switching to modern formats is one of the most effective ways to reduce file size.

Formats like WebP, AVIF, and JPEG XL (JXL) use advanced lossy compression file types to deliver smaller images compared to traditional JPEG and PNG, without noticeable quality loss.

By converting a JPG to AVIF, Tinify’s smart lossy compression reduced the file size by 81%. Can you see the difference?

04. Resize images before compression

One of the most common mistakes is uploading images that are larger than needed.

Always:

  • Resize images to their display dimensions
  • Then apply compression

This reduces file size dramatically before compression even begins.

05. Automate your workflow

For high-volume websites, manual image optimization quickly becomes inefficient. 

With API integrations and plugins for WordPress and Figma, you can:

  • compress images automatically
  • convert formats on upload
  • maintain consistent performance 

Tools to compress images efficiently

The best approach combines automation and optimization:

  • A powerful image compression tool
  • Smart lossy compression methods
  • APIs for automation
  • CDN delivery for performance

Tinify brings all of this together. With George the Panda, you can:

  • Compress images
  • Convert formats
  • Automate optimization
  • Deliver fast images globally

Try compressing your images yourself

Reduce image file size in seconds without noticeable quality loss.

Start optimizing images

Final thoughts

Lossless compression vs lossy compression isn’t about picking one; it’s about using the right method for the right situation.

With the right image optimizer, modern formats, and optimized workflows, you can:

  • Reduce image file size
  • Maintain visual quality
  • Improve website speed and SEO 

Frequently Asked Questions (FAQs)

01. What is lossy compression?

Lossy compression is a method that reduces file size by permanently removing some image data. This approach is commonly used for photographs and formats like JPEG, WebP, AVIF, and JPEG XL (JXL), where smaller file sizes are prioritized while maintaining visual quality.

02. What is lossless compression of images?

Lossless compression of images reduces file size without removing any essential image data, preserving original visual quality. It may remove unnecessary metadata and optimize encoding, but the image itself remains unchanged. Common lossless compression examples include PNG files and certain optimized JPEG workflows.

03. What is the key difference: Lossless compression vs lossy compression?

Lossless compression preserves all essential image data and maintains original visual quality, while lossy compression removes some image data to achieve smaller file sizes. The choice depends on whether exact quality or maximum size reduction is more important.

04. Which file types use lossy compression?

Common lossy compression formats include JPEG, WebP, AVIF, and JPEG XL (JXL), all designed to reduce image file size with minimal visible quality loss. Tinify’s free image resizer supports all the above-mentioned file formats for compression and conversion. 

05. Can JPEG be lossless or lossy?

JPEG is typically a lossy compression format, but some workflows allow near-lossless or optimized compression depending on settings.

06. What is the best way to reduce image file size?

The best approach is to use an image file compressor and convert images to modern formats like WebP, AVIF, or JXL.

Compress PNG to WebP: Convert and Optimize Images for Faster Websites

PNG images are widely used on websites because they support transparency and high-quality visuals. However, PNG files can be much larger than necessary, which can slow down your website and impact performance.

One of the easiest ways to reduce image file size is to convert PNG images to WebP.

In this guide, you’ll learn how to convert PNG to WebP and why switching formats can significantly improve website performance.

How can I compress images from PNG to WebP? You can simply upload your PNG file to a WebP optimizer, which will automatically convert and compress the image. Then download the optimized file for use on your website – reducing file size while maintaining visual quality.

Why convert PNG to WebP?

If you’re using PNG images on your website, you’re often serving more data than necessary. Converting PNG to “next gen” formats like WebP often helps you deliver the same visuals with smaller file sizes.

WebP achieves this through more efficient compression, often reducing image size by 30% compared to PNG at similar quality levels.

This reduction has a direct impact on performance:

  • Faster page load times
  • Improved Core Web Vitals by using next-gen formats
  • Better mobile experience
  • Lower bandwidth usage
  • Stronger SEO performance

For websites with many images, switching from PNG to WebP is one of the simplest ways to improve speed without reworking your visuals.

That said, WebP is not always smaller than PNG. File size depends on the image itself. Simple graphics or already optimized PNGs can sometimes be just as small or smaller.

The advantage is that tools like Tinify automatically compare and optimize your images. You can convert to WebP and compress the PNG at the same time, and Tinify shows you which option gives the best result.

PNG vs WebP: What’s the difference?

PNG and WebP are both widely used image formats, but they serve different purposes.

Feature PNG WebP
Compression type Lossless only Lossy and lossless
File size Larger Smaller
Transparency Yes Yes
Image quality Perfect (no data loss) High (optimized for web)
Best use cases Logos, icons, UI elements Most image types
Browser support Universal All modern browsers

Since WebP supports both lossy and lossless compression, it can be used for a wide range of image types. It is designed for web performance, using efficient compression techniques to reduce file size while maintaining visual quality. If you want a deeper breakdown, see our guide on the pros and cons of WebP images.

That said, PNG is still preferred in some design workflows where exact visual precision is required. Because PNG preserves all image data, it’s ideal for design assets and graphics, but this also results in larger file sizes.

Common use cases for WebP

WebP is especially useful for:

  • E-commerce product images
  • Blog content and featured images
  • Landing pages and marketing visuals
  • Background images and hero banners

Reducing image weight in these areas improves both user experience and performance metrics.

How to compress PNG to WebP

You can compress and convert PNG images to WebP in just a few steps using a PNG to WebP converter like Tinify.

1. Upload your PNG images

Drag and drop your images into the image optimizer or select them from your device. No installation or account is required.

2. Automatically convert and compress

Our free image converter is designed for simplicity, automatically serving as both a PNG compressor and a WebP converter. It applies PNG compression and simultaneously converts your PNG to WebP. 

George the Panda saves you 79% by converting PNG to WebP.

3. Download optimized images

Download your compressed WebP images to your device or to your Dropbox. 

You can also batch convert multiple images at once, making it easy to optimize entire websites or image libraries.

Compress and convert your images in seconds

Reduce PNG file size and convert to WebP in just a few clicks. Save up to 80% without losing quality.

Compress Images Now

When should you use WebP instead of PNG?

If you’re deciding between PNG and WebP, the choice usually comes down to performance versus precision.

Choose WebP for:

  • Website images and content visuals
  • Product images
  • Blog posts
  • Backgrounds and banners

Stick with PNG when:

  • You need pixel-perfect editing
  • You work with design tools that require PNG

Frequently asked questions

01. Does converting PNG to WebP reduce quality?
Tinify’s smart image compression reduces file size while keeping images visually identical to the human eye.

Panda image png
Original PNG – 418kb
Compressed WebP – 90kb

02. Is WebP supported everywhere?
WebP is supported by all modern browsers, making it safe for most websites today.

03. Can I convert multiple PNG files at once?
Yes, Tinify’s image converter supports batch processing, allowing you to optimize multiple images quickly.

Start converting PNG images to WebP today

Optimizing your images is one of the fastest ways to improve website performance.

By converting PNG to WebP, you can reduce file sizes, improve loading speed, and create a better user experience. Want to go further? Automate optimization with an image optimization API or deliver images faster worldwide using an image CDN.

A Better Way to Optimize Figma Exports: Official Tinify Plugin

Exporting images from Figma is easy. Exporting optimized images that meet real performance requirements is not.

Design teams today are expected to deliver assets that are ready for production: small file sizes, modern formats like WebP, and consistent quality across platforms. But getting there often means extra steps, manual compression, or switching between tools after export.

That’s why we built the official Tinify plugin for Figma: a reliable way to compress and convert images directly from your design workflow.

Tinify and Figma: a community-driven beginning

Community-built plugins brought image compression into Figma early on, but they were designed for specialized or lightweight workflows.

AD Compressor is optimized for Google Display Ads. It compresses images only when they exceed a fixed file size limit, batch-processes multiple frames, and packages outputs into a ZIP. This works well for ad compliance, but it’s tightly scoped: formats, resolutions, and compression behavior are largely predefined and not meant to adapt to broader design or development needs.

TinyCanvas focuses on simplicity. It allows designers to export compressed PNG or JPEG images at selectable resolutions and download them in bulk. It’s useful for quick exports, but offers limited control over compression behavior and doesn’t support modern formats beyond PNG and JPEG.

Community-built Tinify plugins for Figma, AD Compressor and TinyCanvas.

What the official Tinify plugin adds

As teams began using Figma exports across websites, apps, and design systems, we saw a need for more flexibility and control, without adding extra steps or tools.

The official Tinify (TinyPNG) for Figma plugin fills this gap by combining the ease of in-Figma export with Tinify’s full compression capabilities:

  • Workflow-first design
    No manual uploads or tool switching, everything happens directly inside Figma.
  • Diverse format support
    Export to PNG and JPEG, as well as next-gen formats like WebP and AVIF, which are often significantly smaller.
  • Smart compression with consistent results
    Uses Tinify’s official compression engine to reduce file size while preserving visual quality.
  • Flexible export options
    Export single frames or multiple selections simultaneously, with scaling options ranging from 1× to 4×.
  • Actively maintained and officially supported
    Developed and supported by Tinify, this tool is fully integrated with the existing Tinify API and your current subscription.

Rather than replacing community plugins, the official Tinify plugin is designed for teams who need modern formats, predictable optimization, and an officially supported solution as part of their everyday Figma export workflow.

Get started now

Getting started is straightforward.

Each Tinify account includes a monthly credit allowance. When used in our plugin, this allowance supports up to 250 Figma exports per month, so you can try the plugin without adding a payment method.

Example of exporting Figma frames using the official Tinify plugin.

API plans and pricing explained

The Figma plugin uses the same Tinify API plans as our other integrations.

  • Free plan: 500 credits per month
  • Paid plans: Choose between: pay-per-compression billing for ongoing usage OR credit bundles for prepaid, flexible use.

If you already use the Tinify API, you can use your existing API key with the plugin. For full details, see our API pricing page.

Figma Image Export & Compression FAQ – Tinify Plugin

  1. How many free image exports do I get with the Tinify Figma plugin?
    Every Tinify account includes 500 free credits per month. Since each image export from Figma uses 2 credits, that’s up to 250 exports per month on the free plan.
  2. Can I use my existing Tinify API key with the Figma plugin?
    Yes. If you already use the Tinify API, you can use your existing API key with the Figma plugin.
  3. Do I need a payment method to use the Tinify Figma plugin?
    No. You can export and compress images from Figma using the free monthly credits without adding a payment method.
  4. Which image formats can I export from Figma using the Tinify plugin?
    The plugin supports exporting and optimizing images in PNG, JPEG, WebP, and AVIF formats.
  5. How does the Tinify Figma plugin compress images?
    The plugin uses Tinify’s state-of-the-art image compression engine to reduce file size while preserving visual quality. Compression is applied automatically as part of the export process.
  6. Which Figma plugin should I use?
    For those looking for the most up-to-date features, consistent output, and official support, we recommend using the official Tinify plugin for Figma. It’s designed for long-term use in professional design and development workflows, with ongoing improvements and support from the Tinify team.

How Adobe Express and Tinify Support Effortless Website Updates

Updating a business website usually happens in pieces. A new page here. A refreshed banner there. Maybe a blog post that finally gets the visuals it deserves. Over time, those small updates shape how the site feels—but without a clear process, they can also introduce inconsistency and unnecessary friction.

That’s why Adobe Express and Tinify work well together during website updates. Adobe Express supports visual creation and consistency. Tinify supports a simple, repeatable preparation step before images go live. Together, they help website updates feel more intentional and easier to manage.

The Short Version

Create visuals with consistency in mind. Finalize them once. Prepare images before uploading. Publish without second-guessing. That rhythm is what keeps website updates from turning into ongoing cleanup.

How to Think About Website Updates Before You Open Any Tools

Most website refreshes feel frustrating because teams jump straight into execution. Pages are edited while visuals are still in flux. Images are uploaded before decisions are final. 

The result isn’t bad work. It’s unnecessary churn.

A more structured approach starts by deciding when each type of work happens. Visual creation should have a clear beginning and end. Publishing should come later, once decisions are locked. When those phases are separated, tools stop competing with each other and start supporting a cleaner flow.

This is less about speed and more about reducing backtracking.

Where Adobe Express Supports Website Updates

Adobe Express is typically used during the creative phase of website updates, when visuals are being created, adjusted, and finalized.

In practice, it’s used to support common update tasks like:

Keeping creative work in one place makes it easier to maintain a consistent look and feel across the site as updates roll out over time.

This creative layer is where visual decisions are made and assets are finalized. Once visuals are approved, the next step is preparing image files for optimal performance on live websites.

Where Tinify Naturally Comes Into The Workflow

Tinify fits in after visuals are complete. Once images are finalized and approved for use, Tinify provides a consistent way to prepare those files for the web before they’re uploaded to a website, blog, or CMS.

Tinify reduces image file size without affecting visual quality or design decisions. This helps pages load faster, improving the experience for visitors and supporting SEO over time, since page speed is one of the factors search engines consider.

How teams use Tinify depends on their setup:

  • Manual compression: Upload images directly to Tinify before adding them to a website.
  • WordPress plugin: Automatically compress images when they’re uploaded to the media library, so every image follows the same preparation step without manual checks. 

Used consistently, Tinify becomes a quiet part of the routine. It’s not a tool teams debate or revisit. It’s a dependable final step before publishing that helps updates feel finished rather than rushed.

Common Friction Points During Ongoing Updates

When websites are updated over months or years, a few issues tend to surface:

  • Visuals look good individually, but feel mismatched together.
  • Blog graphics don’t resemble the rest of the site.
  • Homepage elements are updated often but inconsistently.
  • Images are uploaded without being optimized for performance.

Individually, none of these issues breaks a website. But over time, they create unnecessary follow-up work and make updates feel more complicated than they need to be.

A Practical Workflow to Handle Website Updates

Rather than treating every change like a redesign, many businesses follow a repeatable rhythm:

  1. Create or revise visuals in Adobe Express so they match current branding and layout goals.
  2. Finalize assets once they’re approved for real use—not drafts.
  3. Prepare finalized images with Tinify before uploading them to the site.
  4. Publish updates with fewer revisions and fewer follow-ups.

This flow supports steady improvement without disruption.

Frequently Asked Questions (FAQs)

Is this workflow only for designers?
Not at all. It’s often used by marketing and content teams managing incremental updates like new pages, blog posts, or homepage changes.

Does Tinify change how images look?
No. Tinify reduces file size while preserving visual quality, so design and branding decisions stay exactly as intended.

Panda image before and after Tinify image compression for website updates.
Photo by Pascal Müller on Unsplash

Will this help with long-term consistency?
Yes. Using the same creation and preparation steps for every update helps teams maintain both visual consistency and site performance over time.

Smarter website updates don’t come from doing more—they come from doing things in the right order. Adobe Express supports the creative work of keeping visuals consistent and current. Tinify supports the final preparation step that makes those visuals ready for the web. Used together, they help website updates feel calmer, cleaner, and easier to repeat over time.

Image compression plugin: Better images with TinyPNG’s WordPress Plugin

A fast-loading website is more important than ever. It leads to more conversions and a better user experience. Compressed images have a big influence on that. If you have a WordPress website and want to speed up loading times, the TinyPNG WordPress plugin might be helpful. But what exactly is this image compression plugin and how can you speed up your WordPress website by compressing your pictures?

Why compress images?

Optimizing the size of your images is crucial for ensuring a fast and efficient website. Large image files are one of the biggest reasons behind slow websites as many website owners overlook the size of their images when they upload them into their WordPress websites. While they may look good on the page, this isn’t enough to guarantee the best user experience.

At the same time, the size of your images impacts your SEO, as faster websites rank higher in search results, which results in more visitors and conversions. 

Some experts recommend that your images shouldn’t be more than 1MB, but Shopify advises users to keep image files under 70KB. 

Additionally, as a rule of thumb, your website shouldn’t take more than 3 seconds to load as 40% of users will immediately leave it.

Before you keep on reading, you can use Tinify’s Analyzer to discover how much time you can save on page loading by compressing your images.

Does WordPress automatically compress images?

You might be wondering, does WordPress automatically compress images? The answer is yes, but only to a certain extent. WordPress does compress pictures upon upload, but this default compression might not be sufficient for optimal performance and could make images blurry. To prevent this, an image compression plugin comes in handy.

The image on the right illustrates how WordPress automatically reduces the size of your uploaded pictures by changing the resolution to “Large.” However, this makes the image look quite blurry. If you choose “Full size,” you will notice a clear difference. In this way, a better solution is to select “Full Size” and use a specific image compression plugin to maintain high quality.

Why use an image compression plugin for WordPress?

Having a lot of images on your website takes time to load. A simple way to decrease the loading time of your website is to compress images. An image compression plugin for WordPress can further reduce the file sizes of your images beyond the default compression WordPress provides. This ensures your website loads quickly, improving both SEO and user experience.

For websites made in WordPress, Tinify has an image compression plugin for WordPress that can help you optimize your JPEG, PNG, and WebP images. 

How does the TinyPNG WordPress plugin work?

Your website’s images are compressed through Tinify’s API service to reduce file sizes. The optimization process is tailored to each image, ensuring the best results. Once compressed, the smaller images are sent back to your WordPress site, replacing the originals. 

On average, JPEG images are compressed by 40-60% and PNG images by 50-80% with no visible quality loss. This leads to faster loading times and significant savings in storage space and bandwidth. Every day, roughly three million images are optimized by Tinify!

How to compress images in WordPress

The TinyPNG WordPress plugin allows you to reduce the size of images using the Bulk Optimization tool or by manually selecting them. 

Additionally, it offers 3 options for handling newly optimized images: optimize after upload, optimize during upload, or not compress at all. The last option is ideal for website development to avoid unnecessary compressions.

The image compression plugin allows you to compress 500 images each month for free. The exact total depends on the number of thumbnail sizes that are in use in your WordPress installation. That means that with a standard WordPress installation, you can optimize roughly 100 images each month for free. 

Features of TinyPNG’s image compression plugin for WordPress

  • Optimize images as you upload them
  • Improve single images in your media library
  • Quickly optimize all images in your library
  • Resize large images upon upload for better display
  • Speed up JPEG image loading with progressive encoding
  • Keep copyright info and other data in original images
  • Compress animated PNG files
  • Pick which image sizes to optimize

If you’re looking for a straightforward solution, the TinyPNG WordPress plugin is the way to go. According to our users, TinyPNG is easier to use than other plugins. “It does the job” is common feedback – that and “I love the panda!”. Moreover, users appreciate the convenience of avoiding subscriptions in case they surpass the free monthly limit of 500 compressions. Instead, they can easily pay for additional images for a minimal cost.

It may sound like TinyPNG only helps in reducing file size, but if you think about the Technical SEO side of the website, it helps to improve both page loading speed and PageSpeed Insights scores.”

How to install the TinyPNG WordPress plugin?

The image compression plugin is easy to install on your WordPress website. Instructions are listed on this page. Once installed, you can also switch to a paid account which removes limits and allows you to optimize as many images as you like. 

1. Install the plugin and create an account
Begin by installing the TinyPNG plugin on your WordPress site. Once installed, go to Settings and click on “Compress JPEG & PNG images”. Follow the instructions to create an account. 

2. Select when newly uploaded images should be compressed
You have the option to decide how the plugin should handle newly uploaded images. There are three available options to choose from:

  • Option 1: Compress new images in the background (recommended)
    This is the fastest method for image compression and involves automatically compressing your images in the background. However, please note that this option can potentially cause issues with some image plugins.
  • Option 2: Compress new images during upload
    The second option is to compress new images during upload. This option takes a bit longer but provides higher compatibility with other plugins.
  • Option 3: Do not compress new images automatically
    Lastly, you can also choose not to compress new uploads automatically. In this case, you can manually select the images you want to compress in the Media Library. This is also the recommended option while doing development work on your website.

3. Select image sizes to be compressed
When you upload an image to your WordPress website, WordPress automatically generates different thumbnail versions of it, which can be seen in the Settings > Media section. 

The TinyPNG plugin will compress each of these different sizes of images, which means that if you have 100 images and 5 different sizes, the plugin will perform 500 compressions. To manage which image sizes get generated and compressed by the plugin, uncheck any image sizes that you don’t want to use or compress with the plugin. This allows you to customize the plugin according to your preferences and optimize only the images that are important for your website.

4. Resizing of original images
In addition to image compression, the plugin also provides the ability to resize your original images, which can save storage space. Resizing your images involves setting a maximum width and height for all images uploaded to your website. This process takes one additional compression for each image that is larger than the specified dimensions.

5. Preserving metadata
Lastly, the plugin also allows you to preserve certain metadata. If you do not select any metadata to preserve, all data will be removed during the compression process. However, if you want to preserve certain metadata, you can select the specific data that you wish to keep.

6. Save settings
After making changes to your plugin settings, it’s important to save your changes to ensure that they are applied to your website. To save your settings, simply click the “Save Changes” button at the bottom of the Settings page.

How to measure the impact of image optimization on blog performance

To understand the full impact of image optimization on your WordPress website, it’s essential to track various performance metrics. Here are some key metrics to focus on:

  1. Page load time: A critical metric that directly affects user experience and SEO.
  2. Bounce rate: The percentage of visitors who leave your site after viewing only one page.
  3. Average session duration: The average time a visitor spends on your site.
  4. Conversion Rates: The percentage of visitors who complete a desired action, such as signing up for a newsletter or making a purchase.

To measure these, you can record your current performance metrics using tools like Google Analytics, GTmetrix, and Pingdom. If you are using TinyPNG, the plugin provides a dashboard showing the total savings and compression statistics, helping you monitor the effectiveness of your optimization efforts.

Once you use an image compression plugin for WordPress like TinyPNG to reduce the file size of your images, you can track the same metrics to see the improvements. Compare page load times, bounce rates, session duration, and conversion rates before and after optimization.

Based on the data, make further adjustments. If certain pages are still slow, check for other factors like server speed or unoptimized code. Continuously monitor and refine your optimization strategy to maintain optimal performance.

Testimonial: LearnWorlds improved blog speed with Tinify

LearnWorlds, an online learning platform, had trouble with slow-loading blog pages due to high-resolution images. They tried free tools at first, but they didn’t work well. They used Tinify to automatically compress large images without losing quality, making their web pages load faster:

1. Improved performance: Image sizes were reduced to less than 1 MB, making the website faster and improving Google search rankings.
2. SEO benefits: Faster loading times helped with SEO, leading to better search engine rankings.
3. Easy workflow: Tinify made the optimization process smoother, saving time and fitting well into their workflow.
4. Cost-effective: Tinify was a cost-effective tool for compressing 500 to 1000 images per month.

“In many cases, we are getting very high-resolution images from our design department to upload to the blog. This would mean articles with >3 MB of images if we were to use those.”

Nick Malekos, SEO Manager at LearnWorlds

Conclusion: TinyPNG WordPress plugin in short

The TinyPNG WordPress plugin is a great tool for optimizing your website’s performance by compressing images. It improves page load times, user experience, and SEO without sacrificing quality. 

Whether you have a big website or a personal blog, this plugin is easy to use and seamlessly integrates with WordPress. It offers features like automatic compression, bulk optimization, and customizable settings for metadata and resizing. 

Start enjoying faster and more efficient image handling on your website by installing the TinyPNG plugin today. If you have any questions about the plugin or feedback, let us know at support@tinypng.com, or find us on Twitter or LinkedIn.

Use an image compressor API for better and faster website load time

An Developer API is a quick solution to compress a lot of images on your website in no time. Instead of manually uploading all your photos within an online compression tool, an API can do it all at once. It saves you a lot of time and besides, compressed images make your page speed way faster. It has a positive influence on how long users will stay on your webpage. But what is an API and how can you compress images with it?

Customer story: Learning platform LearnWorlds improved blog speed with Tinify’s API

“By having a lossless solution to optimize the images, we are usually reducing the image load of articles to under 1 MB, improving the speed and the Web Vitals”.

Nick Malekos, SEO Manager at LearnWorlds

LearnWorlds is an online learning platform and learning management system (LMS) that enables individuals, businesses, and organizations to create and deliver courses, training materials, and educational content to learners. It is designed to facilitate the creation of engaging and interactive online courses with various multimedia elements such as videos, quizzes, discussions, and assignments. 

Their website is filled with resources, templates, and articles to help users elevate their online courses. With this, one of their main concerns was to make sure that the number of images uploaded to illustrate their content did not translate into slow-loading pages. To overcome this challenge, their web development team recommended Tinify as a top solution for compressing images automatically on their blog. In this case study, we delve into LearnWorlds’ experience with Tinify’s service and the benefits they gained.

LearnWorlds' Website

Background

Before using Tinify, LearnWorlds employed various online free tools to optimize images on their blog, including converting them to WebP format or resizing them. According to Nick Malekos, SEO Manager at LearnWorlds, this was necessary when dealing with high-resolution images received from their design department:

Picture of Nick Malekos, SEO Manager at LearnWorlds

“In many cases, we are getting very high-resolution images from our design department to upload to the blog. This would mean articles with >3 MB of images if we were to use those.”

Nick Malekos, SEO Manager at LearnWorlds

Resizing images to fit the specific dimensions of a blog is one of the first steps to decrease their file size and cut on loading time. Next to this, adopting next-gen image formats such as WebP is a new way to make images smaller to speed up websites.

Unfortunately, free online solutions often resulted in quality issues and did not yield the desired performance improvements, says Nick. At the same time, optimizing images with no automation tools can become time-consuming, especially for a company like LearnWorlds that uploads several informative articles for their users.


LearnWorlds' website

LearnWorlds discovers Tinify

In their quest for an improved solution, the LearnWorlds’ web development team came across Tinify’s API Developer subscription as a way to automate image compression for their blog. Nick explains that this shift was a “big hands-off improvement” and adds:

“By having a lossless solution to optimize the images, we are usually reducing the image load of articles to under 1 MB, improving the speed and the Web Vitals”.

Nick Malekos, SEO Manager at LearnWorlds

Once they subscribed to Tinify’s API Developer plan, LearnWorlds automated the optimization of blog images, streamlining the process and enhancing web performance and Google Web Vitals, a set of metrics that measures the likelihood of a great user experience. 

From an internal perspective, this allowed their team to spend less time tweaking the file size of their images. Compared to the free image optimization tools they used previously, Tinify provided a significant improvement in image quality and overall performance. LearnWorlds found Tinify to be highly user-friendly. Their developers seamlessly integrated the service into their workflow, making it an effortless and efficient solution for optimizing images on their platform. Furthermore, with a monthly usage ranging from 500 to 1000 image compressions, Tinify’s service proved to be a cost-effective addition. 

Ultimately, as Nick mentioned, it improved their blog’s SEO by compressing images, reducing their size, and thereby contributing to faster loading speeds which helps LearnWorld rank higher on search engines.


Conclusion

LearnWorlds faced a challenge when dealing with high-resolution images received from their design department. Without proper optimization, these images would have led to articles with over 3 MB in image load. By utilizing Tinify’s lossless compression, LearnWorlds reduced the image load of articles to under 1 MB, significantly improving website speed and overall Web Vitals. The seamless integration and user-friendliness of Tinify’s API service made it the ideal choice for the LearnWorlds’ web development team in ways that free online tools couldn’t make it. 

Do you want to improve the load times of your company’s blog? Read more about Tinify’s API Developer here.

Looking for an image size reducer? Learn 5 techniques to better optimize large images beyond compression

“Make PNG smaller”, “how to compress JPEG to 50KB”, and “image size reducer” are a few of the things users type to find a way to compress large images into small ones. However, there is more that users can do than compress their images. While this is key – after all, that’s what Tinify is about! – there are other ways to make sure your images are the smallest size possible.

Large images can slow down your website, which may lead to a negative user experience and even lower search engine rankings. While this may sound obvious, it is common for new bloggers and inexperienced website users to overlook this. The excitement of seeing our little corner of the internet come to life can make us blind to more technical points – like whether our website is taking two seconds more to load than what is recommended. 

So, if your website visitors are first presented with a loading symbol before accessing your content, keep on reading!

Let’s go over some tips and techniques for optimizing large image files to ensure that your website stays fast – including using an image size reducer:

  1. Use the right image format
  2. Use the right image dimensions
  3. Compress your images with Tinify’s image size reducer tool
  4. Convert your images to WebP
  5. Use lazy loading and image caching

“Panda promise” that this will work!

Use the right image format

The first step in optimizing large image files is to choose the right image format. The reason for this is that image formats make a big difference in terms of file size. For example, PNGs end up being larger in size than JPEGs. That’s why JPEG, the most common image format, is the best choice for photographs, while PNG should be used for web graphics, logos, charts, and illustrations, particularly because it handles transparent backgrounds.

Knowing these differences will help you save your images in the right format, which will ensure your website isn’t populated with image formats that are larger than necessary.

Use the right image dimensions: resize and crop images

Another factor that can affect the size of an image file is its dimensions. It’s usual for new website owners to overlook the size of their images, but with this, they might end up uploading too many large images.

Since most websites only display images at a specific size, find out the recommended sizes and resize your images according to them. For example, if you want to upload a header image to WordPress, your image doesn’t need to be larger than 1048×250 pixels. In the end, resizing decreases the file size even further, which will make your website load faster. 

You can resize and crop your images with built-in software on your computer. For Windows users, you can check this link for instructions on how to resize images using Paint. For macOS users, you can use Preview – learn how to here.

If you’re a technical user, you can sign-up for Tinify’s Developer API, which gives you the chance to resize your images within your code, as well as smart cropping options.

Use an image size reducer: Compress your images with Tinify

Another effective way to optimize large image files is to compress them. Image size reducer tools compress the file size of an image by removing unnecessary data and reducing the number of colors. Compression tools are quite effective at reducing the size of large images without any noticeable loss in quality.

According to the e-commerce platform Shopify, a good rule of thumb is to keep your image file size below 70KB. This can be difficult to achieve with large images, and that is why they recommend using image size reducer tools, like Tinify.

You can use Tinify as your go-to image size reducer tool.

While some compression tools give you the chance to choose the level of compression, Tinify’s algorithm is designed to optimize images to their fullest extent at the click of a button. So, when you upload an image to Tinify, we will analyze each image, and based on this, the best optimization level will automatically be determined. There’s so much website owners have to worry about that it’s important for us that they can save time in the process of optimizing their pictures.

If you have a website, you can use Tinify’s analyzer to discover how much loading time you’ll save by compressing your images.

To compress them, you can drop them directly to Tinify’s homepage and upload the compressed image back to your website. Free users have a limit of 5MB per image, but if you find yourself stuck with larger images, you can take advantage of our Web Pro subscription. For WordPress users and developers, there’s an easier way to compress images. All you have to do is to create a Tinify API account, and all your images will automatically be optimized for free up to 500 compressions. 

Convert your images to WebP

Okay, perhaps now your website loads faster than ever – no loading symbol to exhaust your visitors! However, when you add your website to Google’s web analyzer, you realize that more can be done to optimize your images… Like converting them to next-gen image formats. Unlike JPEG and PNG, next-gen image formats were created for web use, which means they’re smaller in size to load faster. 

One example of this is WebP, created by Google. It is similar to JPEG and PNG, but it can produce smaller image file sizes while maintaining the same quality. In this way, you can replace your PNG and JPEG images with WebP to cut even more on loading time. The downside is that this image format only works in modern browsers (Chrome, Firefox, Edge, Opera, etc), so you need to have a fallback option for Internet Explorer and older browsers. 

You can convert your images to WebP online or with Photoshop, and compress them after with Tinify. If you’re a technical user, you can take a look at Tinify’s API to automatically convert your PNG, JPEG, and WebP images. We hope to make this feature available to browser users later this year.

Use lazy loading and image caching

Once you’ve optimized your images, you can also implement a few things on your website to make them load in the best possible way. 

One trick is to implement lazy loading, a technique that delays the loading of images until they are needed. In other words, you can use lazy loading to defer the loading of images until the user scrolls down to the part of the page where they’re displayed. This can improve the initial loading time of the page and reduce the amount of data that needs to be transferred over the network. 

To implement lazy loading, you can use a lazy loading plugin or JavaScript libraries, such as LazyLoad, Lozad.js, and unveil.js. You can also use HTML attributes: the loading attribute can be used to specify the loading behavior of images. The attribute can be set to lazy which will only load the image when it comes into view. This is a native browser feature and is supported by most modern browsers. All in all, these tools allow you to specify which images should be lazy-loaded and when they should be loaded.

Lastly, another technique you can implement is image caching. It’s a technique that involves storing copies of images in a cache which stores the image temporarily in a proxy server or a browser cache. Image caching can be useful for reducing the amount of data that needs to be transferred over the network. It can also help to reduce the load on servers, as it reduces the number of requests that need to be handled. 

For example, a web browser will typically cache images that are downloaded as part of a webpage, so that they don’t need to be re-downloaded each time the user visits the page – this is one of the reasons why cookies exist. You can use a caching plugin for this, or a CDN (Content Delivery Network) so your images are served to users from a server that is geographically closer to them.

If you’re curious about this, Tinify’s CDN might be for you! Tinify’s CDN caches optimized versions of images, which makes it an “all in one” tool for reducing, compressing and caching your images.

TL;DR

If you’re stuck with large images that slow down your website, remember that using only an image size reducer might not be enough to solve this issue. Here are 5 ways to reduce and optimize large image files:

  • Use the right image format: JPEG for photographs and PNG for web graphics, logos, charts, and illustrations.
  • Use the right image dimensions: resize and crop images to the appropriate size by checking the appropriate dimensions for your website.
  • Compress your images with Tinify: Large images can be compressed by a lot with our image size reducer tool without any noticeable loss in quality.
  • Convert your images to WebP, a modern image format that can provide smaller file sizes than JPEG or PNG.
  • Use lazy loading to only load images when they are needed, and image caching to store images so they are served faster to your users.

Take advantage of next-gen images to make your website faster

One of the most read posts in Tinify’s blog is about WebP, a next-gen image format that offers better compression for a faster website. WebP – together with HEIF, AVIF, and JPEG 2000 – is slowly replacing the usual JPEG and PNG image formats. But while they aren’t new, only now more and more users are jumping on the bandwagon and serving images in next-gen formats. If you’re behind on this, don’t worry – the beginning of this new year is perfect timing to take your visuals to the next level.

In this blog post, we talk about:

  1. What are next-gen images and examples;
  2. Which next-gen image format is the best for your website;
  3. What are the advantages of using next-gen images;
  4. How to convert your images to next-gen formats using Tinify.

Ready? Let’s dive in!

What are next-gen images?

Next-gen (short for next generation) images are newer file types that were designed to render faster on the web. Unlike traditional image formats such as JPEG and PNG, they offer better compression, meaning that they can be smaller in file size while still maintaining high quality. 

These new formats include WebP, AVIF (AV1 Image File Format), HEIF (High-Efficiency Image File Format), and JPEG 2000 (JP2). Here is a summary of the key differences between these formats:

  • Compression algorithm: JPEG 2000 uses a wavelet-based compression algorithm, while WebP uses the VP8 and VP9 video coding formats, HEIF uses the HEVC (High Efficiency Video Coding) standard, and AVIF uses the AV1 video coding format. Wavelet-based compression can offer better compression ratios and image quality than the block-based compression algorithms used by VP8, VP9, and AV1, but it can also be more computationally intensive to decode.
  • File size and compression ratio: AVIF has the potential to achieve the best compression ratios and smallest file sizes of these formats due to its use of the AV1 codec. HEIF may also have an advantage in terms of compression ratio and file size due to its use of the HEVC codec. JPEG 2000 and WebP may have slightly larger file sizes, but can still offer good compression and image quality.
  • Features: All of these formats support lossless and lossy compression, as well as transparency. WebP also supports animation and color profiles, while HEIF supports 16-bit color depth and the ability to store multiple images in a single file. AVIF and JPEG 2000 do not currently support animation or color profiles.

Which next-gen image format is the best for your website?

In terms of compression ratio and file size, AVIF probably yields the best results. JPEG 2000 might also offer good compression ratios, but its wavelet-based compression algorithm can be more computationally intensive to decode, which may affect its performance in some applications.

In terms of browser support, WebP is currently the most widely supported of these formats. It is supported by all modern browsers, including Google Chrome, Mozilla Firefox, Microsoft Edge, and Apple Safari. AVIF and HEIF are also supported by many modern browsers, although their support is not as widespread as WebP. JPEG 2000 is less widely supported than the other formats, with limited support in some modern browsers.

Overall, all these formats offer good compression and image quality, but WebP has become the go-to next-gen image format due to its wider browser support. According to Google, WebP can reduce file sizes by up to a third compared to JPEG and PNG images. The only catch is that it is not supported by older browsers, such as Internet Explorer. However, a way around this is to have JPEG or PNG as a fallback and serve these instead in older browsers.  

What are the advantages of using next-gen images?

There are a few different ways in which using next-gen image formats can help you optimize your website. One is that they can help reduce the file size of your images, which can speed up your website’s load time. Another way is that they can improve the quality of your images, making them look better and more professional.

Moreover, next-gen images can also help you save money on bandwidth costs. This is because they are typically more efficient than traditional image formats, meaning that they use less data to achieve the same quality level. This means that you won’t have to pay as much for bandwidth when using next-gen image formats.

In a nutshell, these are the major benefits:

  • Smaller file sizes: Next-generation image formats are typically more efficient at compressing images, which can result in smaller file sizes. This can be especially beneficial for websites that need to load quickly.
  • Improved image quality: Some next-generation image formats offer improved image quality, especially at smaller file sizes. This can be useful for images that need to be displayed at a high resolution or with a lot of detail.
  • Enhanced features: Some next-gen images offer enhanced features that are not available with traditional image formats. For example, some next-generation image formats support transparency or animation, which can be useful for certain types of images.
  • Better performance: Next-gen images can often be decoded and displayed more quickly than traditional image formats, which can improve the overall performance of a website.
  • Reduced bandwidth usage: Using smaller file sizes can help to reduce the amount of bandwidth required to transfer images, which can be beneficial for websites with a large number of visitors or a global audience.

If you are still in two minds on whether you need to convert your JPEG and PNG images on your website, remember that even a one-second difference in loading time can have a big impact. According to Website Builder Expert:

  • A 1-second delay reduces customer satisfaction by 16%.
  • 40% of users wait no more than 3 seconds before abandoning a website.

Besides this, using next-gen images can help you boost your SEO. One of the biggest recommendations of the web analyzer Google PageSpeed Insights is to switch to next-gen image formats, such as WebP. So, if you want to rank higher on Google’s search engine, converting your website images to next-gen formats is worthwhile.

How to convert your images to next-gen formats

Since we launched the new image converter feature for Tinify API users, WebP has been the most converted image type – around 80%. If you’re an API user looking to improve your website speed, this new feature allows you to do that in just one step, simply by making a “convert request” in your code. The Tinify algorithm will automatically convert and compress your images. This assures that you have the smallest version possible of your image without losing quality. API users can find all the information needed to start converting their JPEG, PNG, and WebP images here

Next-gen images: JPEG vs. WebP example
Can you spot the difference?

For non-developer users – such as WordPress users – you’ll need to use a WebP image converter tool. For this, you can upload your pictures into Tinify’s online image converter. This new online feature allows you now to not only compress but also convert your PNG, JPEG and WebP images. After it, you must upload them manually to your website. In the future, along with image compression, we’ll also offer the image converter feature to Web Pro users. Keep an eye out for this on Twitter or LinkedIn!

TL;DR:

  • Next-gen images are designed to be faster on the web and offer better compression, allowing for smaller file sizes while maintaining high quality;
  • Examples of next-gen image formats include WebP, AVIF, HEIF, and JPEG 2000;
  • WebP is the most widely supported of these formats, but fallback options are necessary for older browsers;
  • Next-gen formats will improve your website speed and SEO, according to Google;
  • Tinify users can convert PNG and JPEG images to WebP with the new image converter feature.