Pros and Cons of WebP Images: 2026 Update
WebP is an image format created by Google, built on the VP8 video codec and designed for the web to replace JPEG and PNG with better compression. In 2026, it’s no longer the new kid on the block. Browser support is effectively universal. Two newer formats have emerged as competitors: AVIF, now widely supported, and JPEG XL, still finding its footing. And Google keeps nudging site owners toward next-gen formats through PageSpeed Insights. So, where does WebP actually stand? Here’s a clear-eyed look.
TL;DR
- AVIF is now a serious alternative to WebP. It compresses better, retains more visual fidelity, and has broad browser support across Chrome, Firefox, Safari, and Edge. For image-heavy sites, it’s worth considering alongside WebP.
- WebP browser support is effectively universal. Every major browser supports it. The <picture> fallback is now optional rather than something you need to plan around.
- The format decision is more nuanced than it used to be. WebP is still the right default for most sites. But for high-performance use cases, the emergence of AVIF and JXL means the optimal choice now requires a more nuanced, case-by-case evaluation.
- Tooling has caught up. WordPress, Shopify, and most CDNs now automatically handle WebP. For many sites, switching is less a technical challenge and more a case of turning the right setting on.
What is WebP?
WebP is an image format created by Google in 2010, designed specifically for web use. It supports both lossy and lossless compression, transparency (via an 8-bit alpha channel), and animation. Think of it as one format doing the job of JPEG, PNG, and GIF combined, usually at a smaller file size. For anyone figuring out how to optimize images for web, it’s the most practical starting point.
The pros of WebP
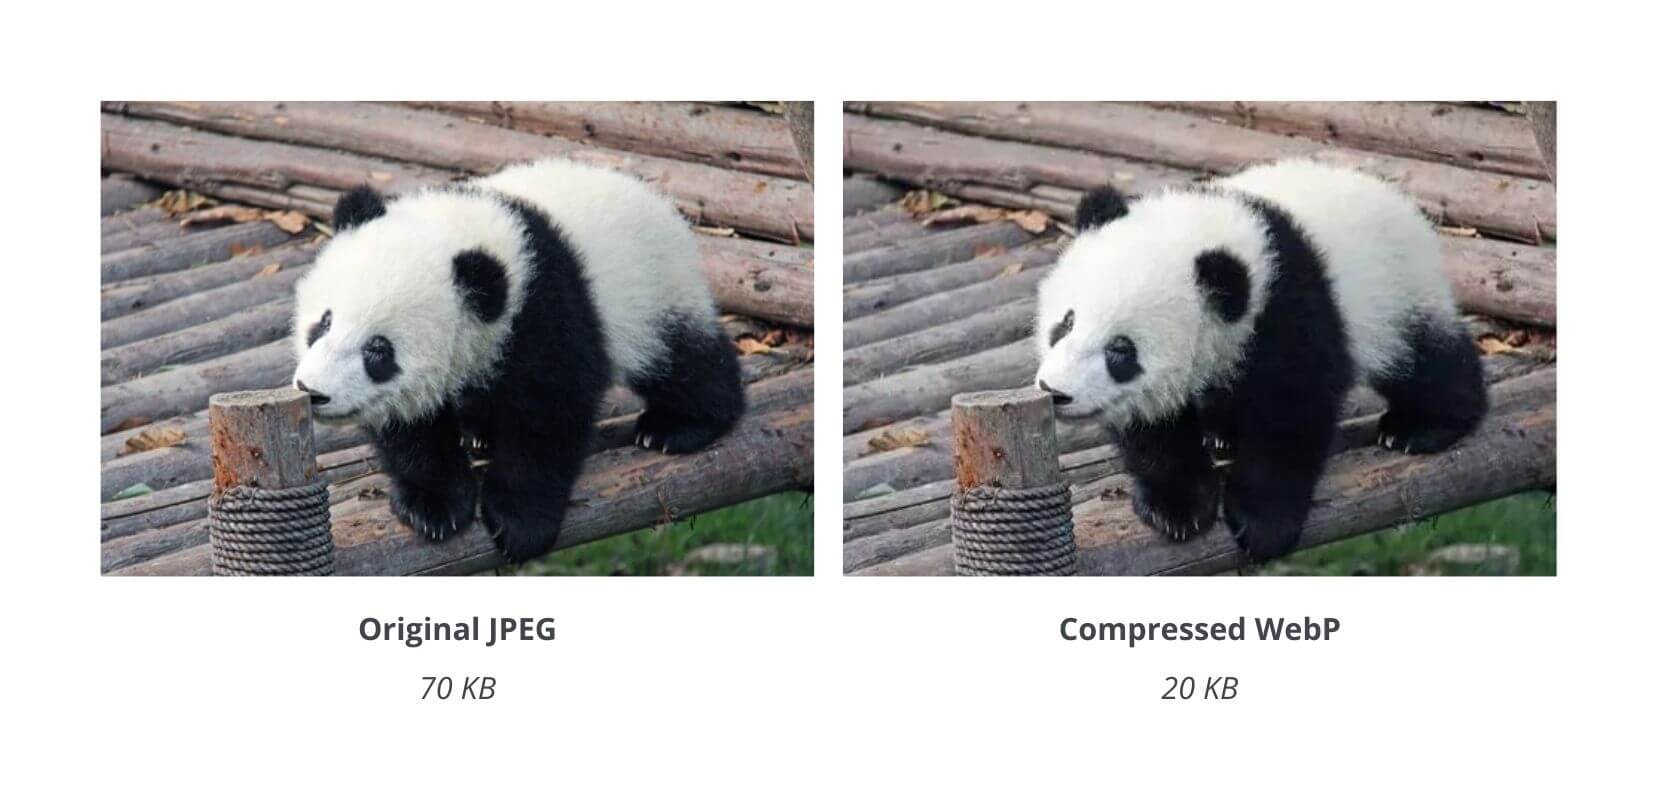
Smaller file sizes
This is WebP’s main selling point, and it holds up. According to Google’s WebP compression study, WebP lossy images are 25–34% smaller than equivalent JPEGs, and WebP lossless images are around 26% smaller than PNGs at comparable quality. For a content-heavy website, that adds up quickly across a full image library.
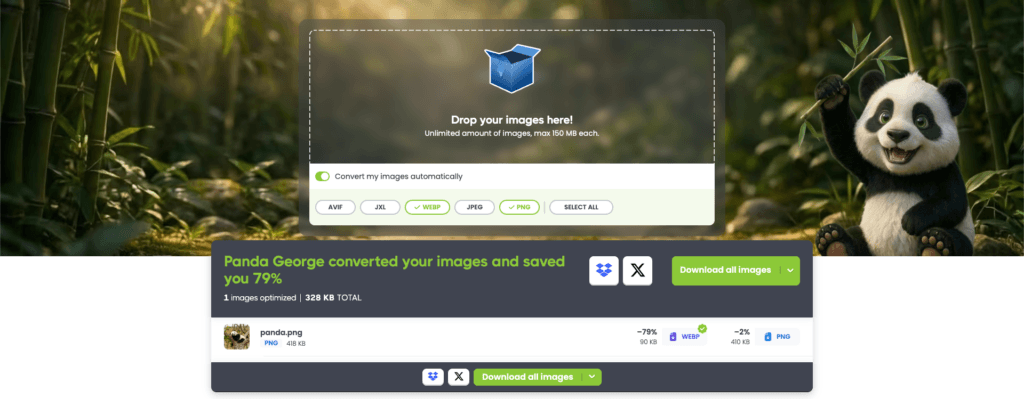
Tinify compresses WebP files using the same smart lossy compression it applies to all major formats. This process can shrink WebP file sizes by up to 80% while preserving the original visual quality. As an image compressor, Tinify supports JPEG, PNG, animated PNG (APNG), WebP, AVIF, and JPEG XL (JXL): you can convert JPEG to WebP, convert PNG to WebP, or simply compress WebP images, all in the browser.
Universal browser support
The compatibility concerns that plagued early WebP adoption are effectively gone. In 2026, every major browser supports WebP: Chrome, Firefox, Safari, Edge, and Opera. Internet Explorer is the sole holdout, and its global usage share is negligible. You no longer need a <picture> fallback just for WebP, though it’s still good practice if you want to be thorough.
One format for multiple use cases
WebP handles transparency like PNG and animation like GIF, which means you can standardize on a single format across most of your image library. Fewer format decisions, simpler workflows.
Both lossy and lossless compression in one format
Most formats are one or the other. JPEG is lossy only. PNG is lossless only. WebP supports both lossy and lossless compression in a single format, which means you can use it for photographs (where some quality loss is acceptable) and for graphics, logos, or images with text (where preserving every pixel matters). You don’t have to switch formats based on image type, because WebP handles both.
Better Core Web Vitals scores
Smaller images mean faster Largest Contentful Paint (LCP), one of Google’s key ranking signals. If you’re currently serving original camera JPEGs or unoptimized PNGs, switching to compressed WebP is one of the most direct ways to improve your PageSpeed score. Google’s PageSpeed Insights flags JPEG and PNG images as candidates for conversion to WebP or AVIF. If you’re wondering how to optimize photos for website performance, that’s the right place to start. For more on the relationship between image size and site speed, see our guide on how to resize images for a faster website.
Broad tooling support
WebP is supported by most image editing software, CMSs, e-commerce platforms, and CDNs. WordPress compresses and serves WebP natively. Shopify serves WebP automatically to supported browsers. Squarespace converts all uploaded images to WebP by default. The TinyPNG WordPress plugin made by Tinify compresses WebP, AVIF, JPEG, and PNG images automatically on upload.
The cons of WebP
AVIF and JPEG XL compress better
WebP’s biggest limitation in 2026 is that newer formats do the same job more efficiently. AVIF (the AV1 Image File Format, released in 2019) consistently produces smaller files than WebP at the same visual quality, with the advantage most noticeable on photographs and high-resolution images. Browser coverage is now broad enough that serving AVIF with a WebP fallback is increasingly practical for performance-critical sites. JPEG XL is also worth watching: Chrome 145 restores native JXL support, and it offers compression competitive with AVIF alongside some useful features like lossless transcoding from existing JPEGs.
Compression artifacts and dimension constraints
Pushing WebP compression too hard can introduce visible artifacts, especially in images with fine textures or intricate details. Tinify’s image optimizer analyzes each image individually to find the right balance automatically, so you don’t have to tune compression settings manually.
WebP also has a hard dimension cap: images cannot exceed 16,383 pixels in either width or height. For most web use cases, this isn’t an issue, but it’s worth knowing if you work with very large source images.
Not ideal outside the web
WebP is built for web delivery. It’s less suited for print workflows, professional publishing, or offline applications. Most print-on-demand platforms don’t accept WebP natively, and color accuracy can be an issue in print contexts. For those workflows, JPEG or PNG remains the standard.
Email clients don’t reliably support WebP
Web browsers have WebP covered, but email is a different story. Gmail only partially supports WebP, converting images to JPEG before delivery, which means transparent backgrounds break. Outlook on Windows doesn’t support WebP at all, showing a broken image instead. If your site sends transactional emails or newsletters that pull images from your media library, serving only WebP images can cause problems. The safest approach is to keep JPEG or PNG originals available as fallbacks for email contexts.
Figma doesn’t export WebP natively
Figma still doesn’t support WebP as a native export format. Designers working on web projects have to export as PNG or JPEG first and then convert separately, which adds friction to the workflow.
Tip: The Tinify Figma plugin solves this directly. It exports and compresses to WebP (and AVIF) in one step, without leaving Figma.
Conversion at scale takes planning
For sites with large existing image libraries, converting everything to WebP takes time and the right tooling. Not all converters handle compression well, and some can produce WebP files that are larger than the original if settings aren’t dialed in. Using a purpose-built tool like Tinify’s image converter avoids this: it compresses and converts in one step, and its algorithm picks the right settings for each image.
Should you use WebP in 2026?
Yes, with one nuance.
WebP remains a solid, reliable choice for most websites. The file size savings over JPEG and PNG are real, browser support is effectively universal, and tooling is mature. If you haven’t made the switch yet, there’s no good reason to wait.
The nuance is that AVIF now competes seriously for the same role. The practical recommendation for 2026 looks like this:
- For most sites (blogs, marketing pages, portfolios): Use WebP. It’s simple, well-supported, and a clear improvement over JPEG and PNG.
- For image-heavy or performance-critical sites: Consider serving AVIF to modern browsers with WebP as a fallback, using the <picture> tag or a CDN that handles format negotiation automatically.
- For animated images: WebP is still the safest choice. AVIF animation support varies across implementations, and JXL animation support is even more limited.
- Keep an eye on JPEG XL: If Chrome enables JXL by default in a future release, adoption could accelerate quickly. It’s not a format to serve today, but worth factoring into longer-term planning.


How to convert your images to WebP
You can convert JPEG, PNG, AVIF, and JXL images to WebP directly on Tinify’s WebP converter. Upload your images, select WebP as the output format, and Tinify will convert and compress them in one go. It also works the other way: if you need to convert WebP to PNG or another format, the same tool handles that too. The free tool allows up to 3 conversions per session; the Web Ultra subscription gives you unlimited conversions. New to image compression? Our image conversion for beginners guide walks you through the basics.
For teams with larger workflows, Tinify has tools for every setup:
- Tinify API: Handles compression and conversion in a single step, with direct export to Amazon S3 or Google Cloud Storage. Includes 250 free conversions per month.
- Tinify WordPress plugin: Compresses and converts images automatically on upload, powered by the Tinify API. Includes 500 free compressions per month.
- Tinify Figma plugin: Optimizes images directly from your design exports, no extra steps needed.
- Tinify CDN: Automatically serves WebP images (and other supported formats) to browsers that support them, with no code changes required on your end.
WebP isn’t the newest format anymore, but it’s still one of the most practical ones. Converting your existing JPEG and PNG images to WebP will improve page speed and reduce bandwidth. If you want to go further, pairing it with AVIF gives you the best of both worlds. And if Chrome ships JPEG XL support by default, it may become the next format worth switching to.
Frequently asked questions (FAQs)
01. Is WebP better than JPEG and PNG? For web use, yes. WebP lossy files are 25–34% smaller than equivalent JPEGs, and WebP lossless files are around 26% smaller than PNGs, at the same visual quality. Note: Platform support has improved significantly, but it’s still worth checking your CMS and third-party tools before switching your whole library over.
02. Does WebP work in all browsers? Yes, in every browser that matters: Chrome, Firefox, Safari, Edge, and Opera. Internet Explorer doesn’t support it, but IE’s global usage share is negligible.
03. Is WebP or AVIF better in 2026? That depends on your priorities. AVIF compresses better and browser support has caught up, but WebP is simpler to work with and supported across more tools and platforms. For most sites, WebP is still the right default. For image-heavy or performance-critical sites, serving AVIF with a WebP fallback via the <picture> tag gives you the best of both.
04. Does converting to WebP reduce image quality? Tinify’s smart lossy compression automatically finds the right balance, reducing file sizes by up to 80% with no noticeable quality loss. Lossy compression does remove some image data, but the difference isn’t visible to the human eye.
05. Can I convert PNG or JPEG to WebP for free? Yes. Tinify’s free online image converter lets you convert up to 3 images per session. Compression happens alongside conversion, so you get the smallest possible file in one step. Web Ultra removes that limit for unlimited conversions.
06. What is JPEG XL and should I use it? JPEG XL (JXL) is a new image format that offers compression comparable to AVIF. A significant advantage is its ability to losslessly transcode existing JPEGs, allowing the original file to recover later. Chrome 145 restores native JXL support, with partial support in Firefox and Safari too. Browser coverage is still in the early stages, so WebP and AVIF are the practical choices for now, but JXL is worth keeping on your radar.
07. How do I serve WebP on WordPress? Install the TinyPNG WordPress plugin (by Tinify). It compresses WebP, AVIF, JPEG, and PNG images automatically on upload, with 500 free compressions per month. WordPress has supported WebP natively since version 5.8.