Image conversion for beginners: A simple step-by-step tutorial
Image conversion is a fundamental skill for anyone working with digital media, whether you’re a graphic designer, photographer, or tech enthusiast. If you’re new to the world of image conversion, this tutorial will guide you through the basics, helping you understand the process and convert images with ease.
What is image conversion?
Image conversion is changing an image from one file format to another. This can be necessary for various reasons, such as reducing file size, ensuring compatibility with specific software, or preparing an image for a particular use case (e.g., web, print, social media).
Common image formats
Before diving into the conversion process, it’s helpful to understand some of the most common image formats:
- JPEG (Joint Photographic Experts Group): Ideal for photographs and images with many colors. Offers lossy compression, which reduces file size but can affect quality.
- PNG (Portable Network Graphics): Supports lossless compression, and maintains high quality. Perfect for images with transparency and graphics.
- GIF (Graphics Interchange Format): Best for simple graphics and animations. Supports limited colors and can be used for small animations.
- BMP (Bitmap): An uncompressed format that retains high image quality but results in large file sizes.
- TIFF (Tagged Image File Format): Often used in professional photography and publishing. Supports lossless compression and multiple layers.
- HEIC (High-Efficiency Image Coding): Developed by MPEG, this format offers high compression efficiency while retaining excellent image quality. It supports advanced features like multiple images (live photos) and better detail preservation. Often used in Apple’s ecosystem.
- WebP: Developed by Google, this format provides superior lossless and lossy compression for images on the web, reducing their file size. It supports transparency (like PNG) and animation (like GIF), making it versatile for web use.
Why should you convert your images to smaller sizes for websites?
One of the most significant factors affecting website performance is the size of the images used. Converting images to smaller sizes improves various aspects of a website, from user experience to search engine optimization (SEO).
1. Faster loading times
- Speed matters: The loading speed of a website is directly related to user satisfaction. According to studies, 53% of mobile users abandon websites that take longer than three seconds to load. Large images are one of the main reasons behind slow-loading websites.
- First impressions count: Visitors are more likely to stay and interact with a website that loads quickly. Fast loading times lead to a better first impression, increasing the likelihood of conversion and engagement.
- Universal access: Optimized images make your website more accessible to users with varying internet speeds and devices, including those in regions with slower internet connections.
- PageSpeed Insights: Tools like Google PageSpeed Insights assess website performance, including image optimization. Smaller images help achieve better scores, indicating a well-optimized site.
- Core Web Vitals: Metrics such as Largest Contentful Paint (LCP) and Cumulative Layout Shift (CLS) are influenced by image sizes. Optimized images contribute to better Core Web Vitals, enhancing overall site performance.
2. Improved SEO rankings
- Google’s Algorithm: Search engines like Google consider page load speed as a ranking factor. Faster websites are more likely to rank higher in search results, driving more organic traffic to your website.
- Mobile optimization: With the rise of mobile-first indexing, having a mobile-optimized site is crucial. Smaller images enhance mobile site performance, aligning with Google’s preferences.
- Reduced bounce rates: Faster load times lead to lower bounce rates, as users are less likely to leave a site that loads quickly. Lower bounce rates positively impact SEO.
- Increased dwell time: A faster, more responsive site encourages users to spend more time exploring your content, further boosting SEO performance.
3. Bandwidth and hosting savings
- Storage savings: Smaller image files take up less storage space, reducing the costs associated with web hosting.
- Reduced bandwidth: Smaller images consume less bandwidth, which is especially beneficial for users with limited data plans or slower internet connections. Additionally, lower bandwidth consumption can result in lower hosting fees, particularly for websites with high traffic volumes.
- Lower server load: Smaller image files reduce the load on your server, allowing it to handle more simultaneous users without performance degradation.
A step-by-step guide to image conversion
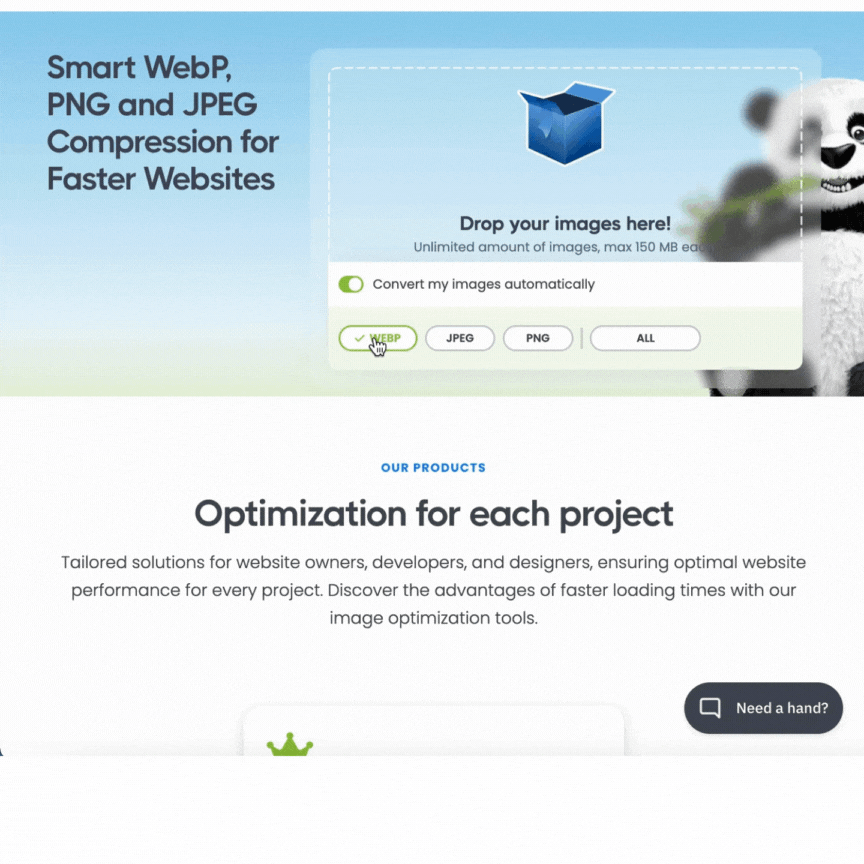
To convert your images to and from PNG, JPEG and WebP, you can use Tinify’s free image converter. No account creation or new software installation is required. For unlimited image conversions, you can upgrade to Web Ultra.
1. Upload your image: Simply choose the image you want to modify and click or drag it into the converter.
2. Select PNG, JPEG or WebP as the output: Opt for “convert your images automatically” and choose your preferred image format to convert. The image conversion process will start on its own. Alternatively, you can choose “select all” and pick the format that results in the smallest size.
3. Download the converted image: After the conversion is complete, just click the download button to keep the WebP image on your device.
💡 Bonus: Tinify’s image converter also compresses your images automatically. It shrinks file sizes by up to 80% without compromising quality, leading to speedier page loading.
Common problems in image conversion and how to solve them
Image conversion can lead to issues like quality loss, file size problems, and compatibility errors. As a newbie in image conversion, it’s important to know how to solve them to ensure optimal results.
Problem 1: Loss of image quality
Issue: Converting an image from one format to another can result in a noticeable loss of quality, especially when using lossy compression methods.
Solution:
- Use lossless formats: Use lossless formats like PNG or TIFF if quality preservation is crucial.
- Adjust compression settings: If using a lossy format like JPEG, adjust the compression settings to find a balance between file size and image quality. Another option is to use tools that can determine the optimal conversion ratio for you, like Tinify’s image converter which can automatically convert images.
- Maintain original files: Keep a copy of the original file. This way, you can return to the original quality if needed.
Problem 2: Image file size issues
Issue: Converted images can sometimes still end up being much larger than anticipated, affecting storage and loading times.
Solution:
- Choose the right format: Use formats suited to your needs. JPEG is good for photos with smaller file sizes, while PNG is better for high-quality graphics. For the web, WebP is recommended as it offers smaller image file sizes.
- Resize images appropriately: Resize your images before conversion to the dimensions you need to avoid unnecessary large file sizes.
- Use image compression tools: In addition, tools like TinyPNG can help reduce file size without significant quality loss.
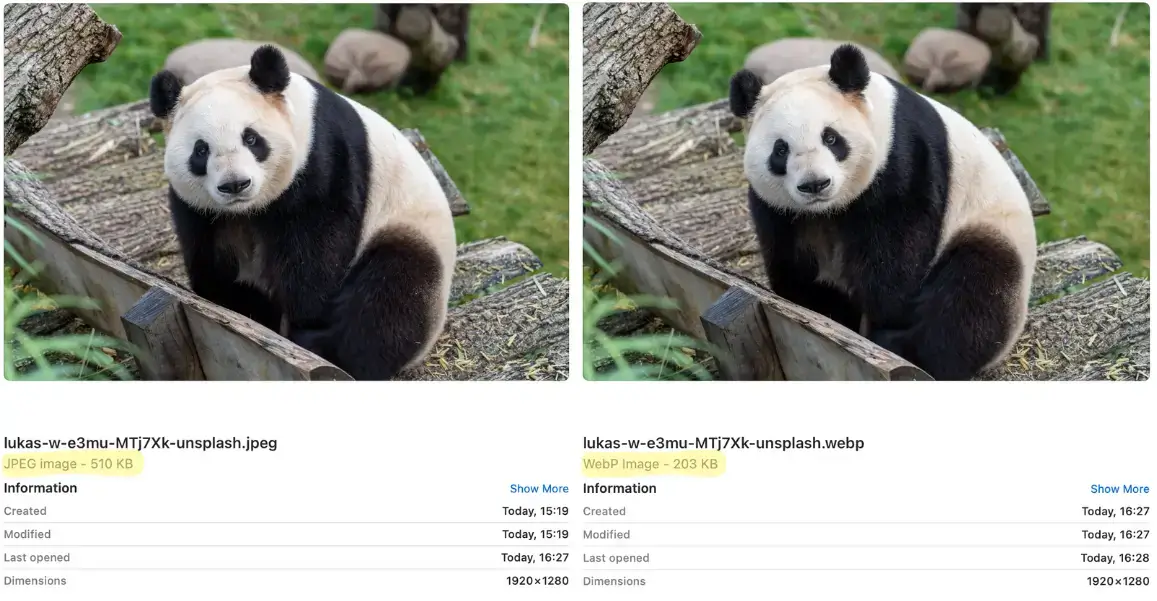
JPEG vs WebP. The picture on the right was converted to WebP using Tinify’s image converter. The new image file size is significantly smaller. Photo by Lukas W. on Unsplash
Problem 3: Incompatibility with software, browsers or other platforms
Issue: Some formats may not be supported by certain platforms, leading to issues when opening or displaying the images.
Solution:
- Check compatibility: Before converting, check the requirements of the software or platform to ensure compatibility. For example, WebP images are not supported by Internet Explorer browser and SquareSpace website builder.
- Convert to common formats for web: Use widely supported formats like JPEG, PNG, or WebP for better compatibility.
- Update software: Ensure that you are using the latest version of your software, as it may support more formats.
Problem 4: Transparency loss
Issue: Some formats do not support transparency, leading to a loss of transparent areas in the image.
Solution:
- Use PNG, GIF or WebP for transparency: Both PNG and GIF formats support transparency. Choose these formats when transparency is needed. WebP is often better for transparent images due to its superior compression efficiency and quality, resulting in smaller file sizes.
Problem 5: Metadata loss
Issue: Converting images can strip out metadata, which includes important information like copyright details, camera settings, and more.
Solution:
- Use software that preserves metadata: Some tools offer options to preserve metadata during conversion. Tools like Adobe Photoshop or ExifTool can help.
- Manually add metadata: After conversion, manually add back important metadata if it has been lost.
Problem 6: Unexpected file corruption
Issue: Sometimes, converted files may become corrupted and unusable.
Solution:
- Use reliable tools: Use well-known and trusted conversion tools to minimize the risk of corruption.
- Check files immediately: Always check the converted files immediately after conversion to ensure they are not corrupted.
- Backup files: Keep backups of your original files to avoid losing important data.
Problem 7: Incorrect resolution
Issue: Converting images without paying attention to resolution settings can result in images that are too low or too high in resolution.
Solution:
- Set resolution before conversion: Adjust the resolution settings in your conversion tool before converting the image.
- Use appropriate resolution: Use a resolution suitable for your end use – 300 DPI for print and 72 DPI for web.
Problem 8: Limited batch conversion options
Issue: Converting multiple images at once can be time-consuming if your tool doesn’t support batch processing.
Solution:
- Use batch conversion tools: Tools like TinyPNG and Adobe Bridge offer batch image conversion features.
- Automate with scripts: For advanced users, writing scripts to automate batch conversion can save time and effort. You can use Tinify’s API in your scripts to automate batch image conversion.
Tips for successful image conversion
- Check quality settings: Some tools allow you to adjust the quality settings. Higher quality usually means a larger file size. Tinify’s image converter takes care of this for you by choosing the best quality vs. size ratio, ensuring your images look the same without any noticeable loss in quality.
- Maintain aspect ratio: Ensure that the aspect ratio (the ratio of width to height) remains consistent to avoid distorting the image.
- Backup original files: Always keep a copy of the original image in case you need to revert any changes.
- Use appropriate formats: Choose the right format for your needs. For example, use JPEG for photos, PNG for graphics with transparency, GIF for animations and WebP for online use.
Conclusion
Knowing how to convert images is important for website owners. This guide explains the process of changing image file formats to make them smaller, compatible, or suitable for specific purposes.
It’s important to convert images to smaller sizes for better website performance, faster loading times, improved SEO rankings, and lower bandwidth costs.
You can simplify this process by using Tinify’s free image converter, which allows you to convert your images to and from JPEG, PNG and WebP, so you don’t have to worry about quality loss, file size issues, and compatibility problems.