How to install Tinify CDN on your WordPress website
This blog post will walk you through the process of installing Tinify CDN on your WordPress website. It only takes a few minutes and you have the chance to try it out for 14 days with no credit card details required. By the end of this, your website will become faster and perform better for users!
One of the main advantages of using a WordPress website is the user-friendly interface that makes it perfect for both beginners and advanced users to manage their websites. Whether you have a small personal blog or a large enterprise website, WordPress allows you to scale your website by adding new content and integrate third-party services to extend the functionality of your website as your requirements evolve.
This is how WordPress users can easily compress their images with our popular TinyPNG plugin to make their website faster on the go. But besides this, if you’re a WordPress user looking for even faster page load speeds, you can also take advantage of Tinify CDN – it only takes a few clicks!
Long, story short: Why use a CDN?
Is your WordPress website suffering from slow loading times? Or has your traffic volume increased? Does it contain large media files throughout its pages? Do you have an international audience? If you replied yes to any of these questions, then implementing a CDN is likely beneficial.
CDNs improve website performance by reducing data travel distance and caching content in various geographic locations. A website that doesn’t use a CDN is dependent on a single server, in a single connection. This means that the further the users are from your location, the longer it takes for your content to load.
For example, when a person somewhere in Europe visits a website located in the US, the data has to travel a very long distance through servers, which consequently adds up to a longer loading time. However, when a website uses a CDN network, the data of the website will be loaded from a server closer to the user – in this case, somewhere in Europe. This drastically improves the performance of your website.
Tinify CDN is both an Image and Multi-CDN. This means two things: firstly, our CDN offers the ability to compress on the fly. Large images become the smallest size possible with no loss in quality, and this change, invisible to the eye, makes your website automatically faster. Secondly, we work with multiple Content Delivery Networks which ensures the greatest possible global coverage.
1. Sign-up for Tinify CDN’s trial
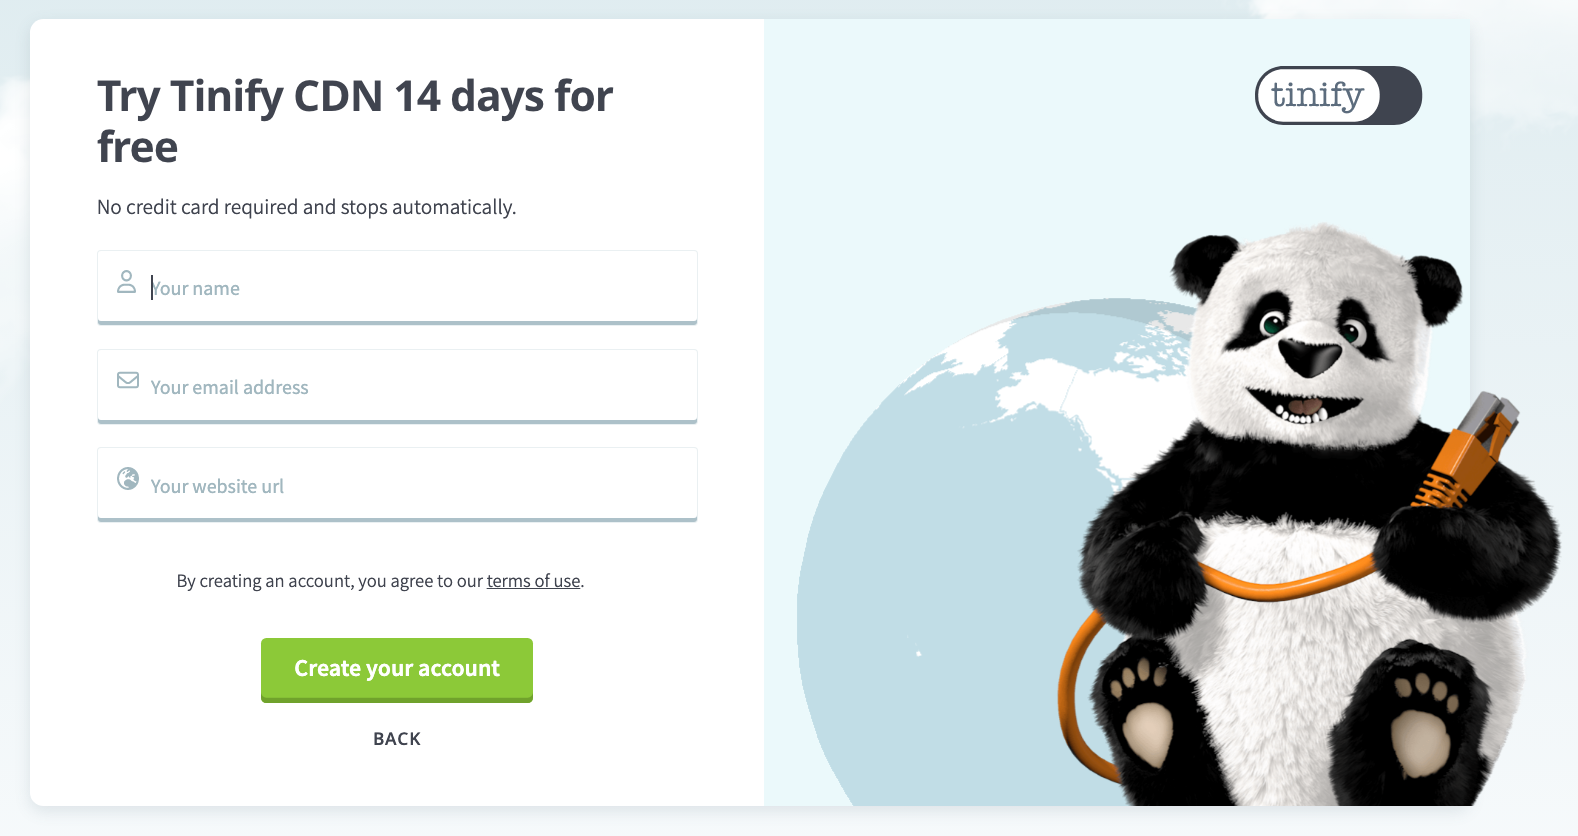
Visit the Tinify CDN website and sign-up for an account. We give users the chance of trying it for free for 14 days, so no credit card details are required. You just need to provide your email address and website url.
If you’re already a Tinify user, you can also sign-up for a trial on your dashboard by clicking on the “CDN” link on the side-bar.
2. Obtain your Tinify CDN endpoint
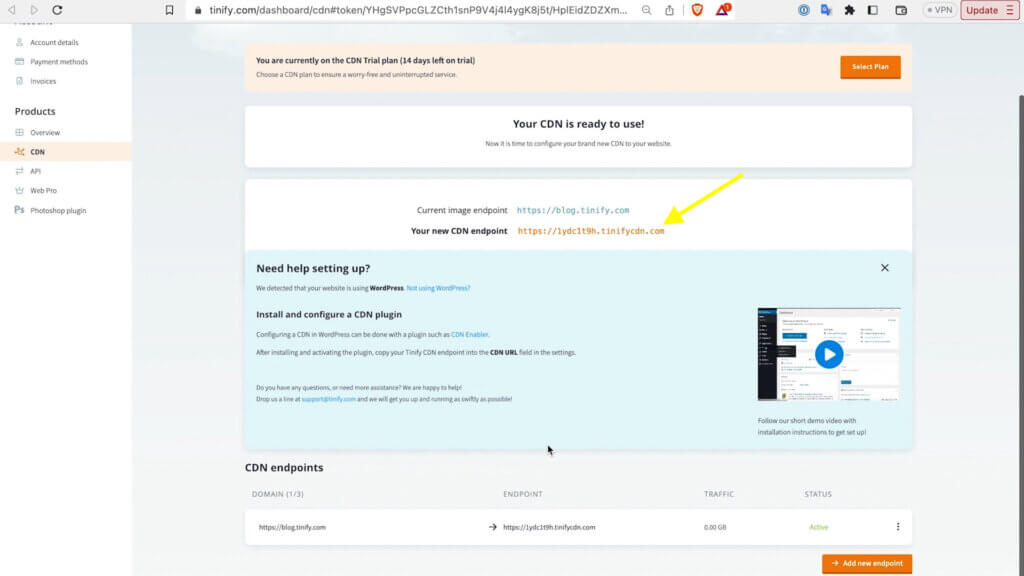
After signing-up, you’ll get a welcome email so you can log-in to your Tinify account. Once you do it, you can access your CDN dashboard. There, you’ll find your CDN endpoint, which looks like this: “https//xxxxx.tinify.com”. This is a sort of personal “configuration code” that allows you to connect your WordPress website to Tinify CDN. Copy this CDN endpoint as you’ll need it later.
3. Download the WordPress CDN plugin “CDN Enabler”
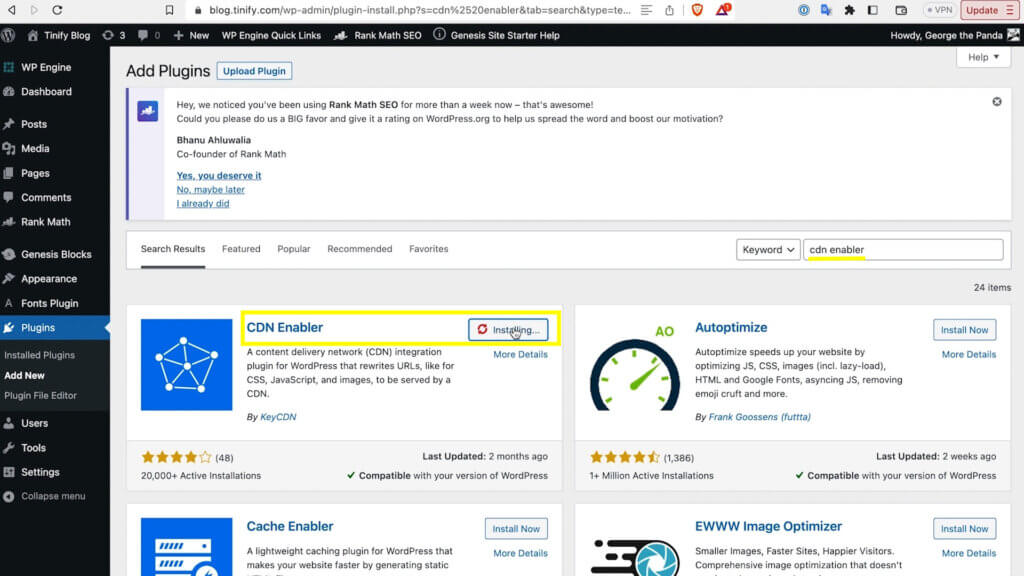
Go to your WordPress dashboard and click on the “plugins” option on the side-bar. To configure a CDN in WordPress, you’ll need to download a plugin such as CDN Enabler.
4. Configure the CDN on your WordPress account
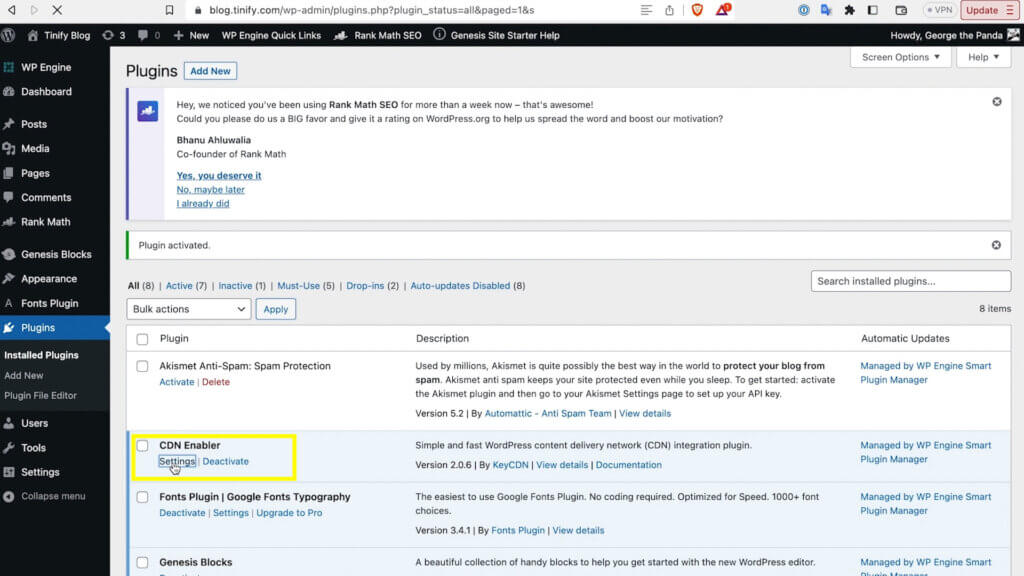
After installing and activating the plugin, click on “Installed Plugins” on the side-bar and select the “Settings” under the CDN Enabler plugin.
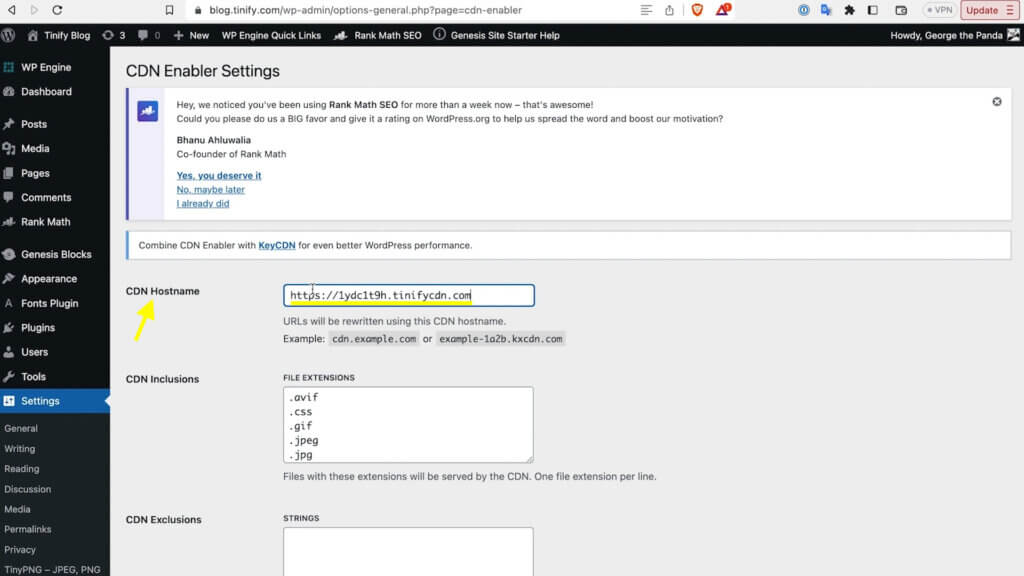
This will lead you to another page where you’ll see a field called “CDN Hostname”. Copy your Tinify CDN endpoint into this field. The last step is simply to click on the button “Save Changes”. That’s it!
How do you verify if Tinify CDN is working on your WordPress website?
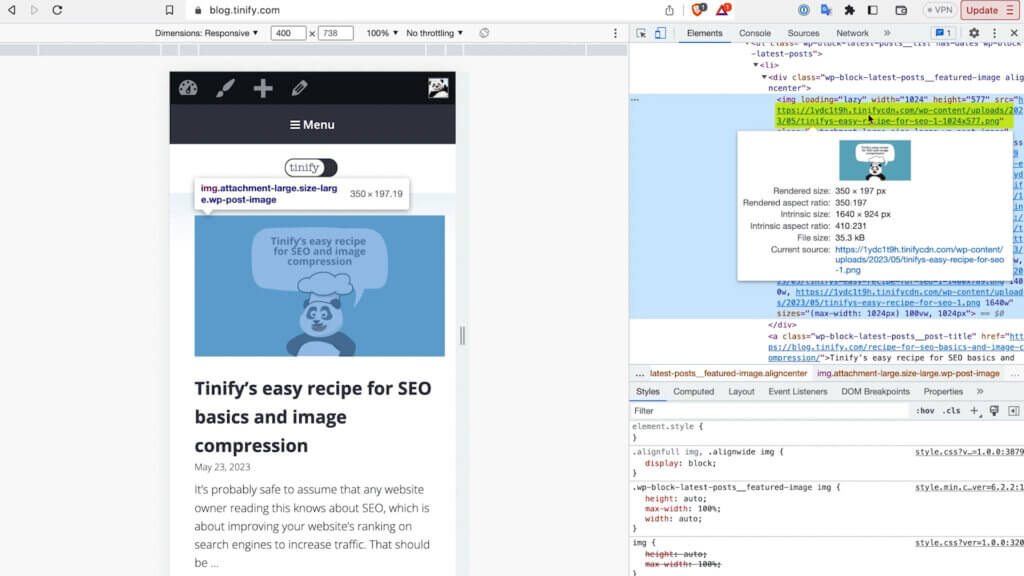
After enabling the CDN, visit your website and inspect the source code of the page. Look for the URLs of your static assets, such as CSS files, JavaScript files and, of course, images. If the URLs of those assets contain the Tinify CDN domain, it means the integration has been successful!
Watch the instructions video:
Choose one of the 3 Tinify CDN plans
Once you’re done with your 14-days trial, you can sign-up for one of our plans: Basic, Business and Enterprise. The basic subscription is made for personal websites and blogs, while the business plan caters to professional and e-commerce websites. If you have specific business needs and demand more support, you can contact us so we can create a tailored enterprise plan for you.
Do you have any questions about Tinify CDN or its implementation? Shoot us an email at support@tinify.com.